Especially this time of year, I see lots of frantic posts on Facebook about people having issues with condensation in their RVs. They see water droplets on their windows, moisture under their mattress, in their closets and in cupboards and dripping from their hatches.
Condensation, a sign of high humidity is a very serious challenge for RVers and one that should not be ignored. The fact is that if you are seeing any of the above signs of high humidity, then chances are very good that there are all sorts of other places you have moisture that you are not seeing.
Condensation happens when warm air with a high moisture content meets a cold surface. When warmer, moist air meets a colder surface, the air looses its ability to hold moisture and this causes the water vapor to change from a vapor to liquid water. I could go more into detail but hopefully this answer will suffice for our discussion.
It is really important to remember that condensation is a symptom of high humidity. To rectify it, you must lower the humidity in the air.
Why is an RV more likely to have condensation issues than your house? There are two basic reasons:
1. RVs are not insulated like your “sticks and bricks” house. Insulation prevents walls from being cold and keeps the heat in and the cold out.
2. The area in an RV is much smaller in a home so the moist air produced by cooking, washing dishes, showering and other normal activities of daily living has much less of a chance to be dissipated and is therefore much more concentrated in an RV
High humidity is not just inconvenient. If left unchecked, it can lead to mold and mildew and real costly damage to your home on wheels. High humidity can also damage wood and other materials your RV is constructed with.
Plan of Attack
After more than 18 years of living full time in RVs in all sorts of climates from South Florida to Arizona and Northern and Southern California, here is a plan of attack.
1. When purchasing a new or used RV
a. What is the level of insulation in the RV? take a look at this link to learn more about insulation. https://www.rvingplanet.com/blog/ultimate-guide-to-rv-insulation/. Especially if you know you will be in high humidity climates like Florida, this should be a major consideration when purchasing.
b. Dual pane windows are a great option. In this type of window, a space of air is place between two panes of glass and will keep the window warmer making the air less likely to condense.
2. Always monitor the humidity level in your RV. You can buy inexpensive humidity monitors like this
Buy a couple and place them in different rooms in you RV. You should always try to keep the humidity level in the low 30s.
3. Air flow is key. Warm air trapped in closed cabinets and closets and meeting a cold outer wall will cause condensation. It will help to always keep closets and cabinets open or partially open to allow for air flow in high moisture situations.
4. Always use your hatches and vent fans. The best procedure is to open a vent and turn on the fan to pull air out. Then open a window near the source of the humidity(cooking, showering, washing dishes etc.). This process will draw air from the outside, mix it with the high moisture air and pull it out of the RV through the vent.
5. You can add extra insulation to cabinets, under the bed etc. It is important to note, however, that this does not fix the problem. It only addresses a symptom. It does not reduce the moisture in the air.
6. Buy a dehumidifier.
A good humidifier that is the compressor type can truly be a game changer. It is incredible the amount of water that it can remove from the air. It does not mean that you do not need to take the preventative measures listed in #2 though #5 above but it can make a huge difference. As full timers, we struggled for years before taking this step.
a. We tried desiccants like “Damp Rid” which are bags that you hang in closets or little tubs that you place around. We found them to be next to useless as they remove only a small amount of water. They also can leak and spread chemical on clothes.
b. We have also tried small “mini dehumidifiers” that use the same principal as the bags above but have a fan and the absorbing material is reusable.
c. We also tried a “dryer” which is nothing more than a small heater.
d. In our opinion, the only meaningful dehumidifier solution is one with a heat pump. This solution costs a bit more, is somewhat larger and has a compressor as its main component. It also produces slightly warm air in its discharge of dry air. We found this solution truly amazing in the difference it made. We emptied gallons of water daily until we got the humidity level down. We placed our unit in the bathroom at the rear of our 40 foot motorhome and it reduced the humidity dramatically in the entire coach. We wished we had done this years ago!!! Below is the humidifier we purchased. It has been flawless. It is quiet, dependable, incredibly easy to clean and worth every penny.
Please don’t hesitate to write us with any quesitons or comments on this topic. We are always here to help.
How to get better air flow from bedroom roof a/c unit or any air flow?
John
RVlivingfulltime.com says:
Morning John,
Great question. We have the same issue in our motorhome and there are two possible solutions and we are using both.
The idea of both of these possible solutions is to cut off the air flow, or reduce it to the areas of your RV that have ample air flow and force that air to the other areas of the RV that need more air flow.
1. You can buy new vents on line on Amazon that have louvers that you can close.They are kinda pricey. This will force more air to other vents in the motorhome. The vents are really easy to replace. Most of ours just pull out and then you can push in the new ones.
2. A less expensive and equally effective solution is to cut circular pieces of cardboard that will just fit the vent. Then you take off the vent, and tape the piece of card board to the back of the vents thereby blocking the air from coming out. We tape them to the vent as we didn’t want to risk that somehow the piece of cardboard could get blown off the vent and go into the duct work.
If I feel a soft spot on the corner of the roof but the material is good still what should I do? water does puddle there, thanks Cliff
RVlivingfulltime.com says:
This is a difficult question. All RVs have spots on the roof where it is less firm than others. Usually this is because of the supportive structure underneath. For example you may feel a different firmest if you are standing on a spot where there is a beam directly underneath, as opposed to a place between beams. Here are a couple of things to consider when evaluating whether this is a soft spot to be worried about:
A. Is this soft spot near any intrusion into the roof? Meaning is it near a hatch or vent pipe or antenna?. This could mean that caulking around the intrusion has failed and water has leaked in causing damage.
B. Is there any indication inside below the soft spot that there is water damage? Press firmly against walls and corners inside to see if there is softness inside the RV right below the outside soft spot. If there is corresponding soft spots inside and/or discoloring of the walls or corner inside, this is a pretty conclusive indicator that there is water damage in this area.
I hope that this information is helpful. Thank you Cliff for being a subscriber to Rvlivingfulltime.com. Please don’t hesitate to write me back if you have further questions.
There is a lot to say about maintaining the interior of your RV. Keeping your home clean, treating wood surfaces, replacing furniture and much more.. Check back on this section to watch it grow.
Hello, can you recommend where to get a 67 inch jack knit sofa to replace one in a 2015 forester 31 ft RV?
Cliff
RVlivingfulltime.com says:
There are several good RV furniture suppliers on line, but the one that I have had experience with is www.recpro.com . A year ago we bought a really nice lounge chair to replace the really gigantic one in our Tiffin Phaeton. The quality of the chair is excellent and we use it every day as a work chair. In the almost one year of use, we have noticed no indication of wear on either the fabric or the wooden frame. I would recommend this company. I checked their website and they definitely carry 67” jack knife sofas.
We have a 2019 Montana highcountry and every time the wind blows just a little the dirt and dust comes in in the window tracks , around the screws and about a inch on the glass. We are retired full timers and I would appreciate a fix of some sort.
Thank you
Carol
RVlivingfulltime.com says:
Morning Carol,
Thank you for your question.
There is of course, lots of material addressing the issue of windows in RVs leaking water but not so many for windows leaking air and dirt. I am also not sure what type of windows you have, but here are a couple of ideas:
1. One of the simplest would be to turn on one of your ceiling vent fans with the air being sucked in from the outside. Don’t open a window. This will actually create a bit of a higher pressure in the RV than outside that could prevent air and dirt from coming in.
2. By the same token, make sure you do not have any ceiling vent fans on drawing the air out of the motorhome because, that would suck air in through any cracks in the seals around the windows.
3. If your windows are not frameless and have “weep” holes, a simple thing you can do is to tape over these holes. “Weep” holes are small slots along the frame of the window outside that allow the water collecting in the window frame to drain when it rains. It is essential that you remove the tape before it rains, as if these holes are plugged, you will get water inside.
4. Another possible solution is to get some window/door sealing foam strips. Cut small length with a razor blade to fit the track in the window. Take these pieces of foam insulation and wedge it in the open tracks inside and out. It is important that you remove these strips, however, when it rains, as your windows might not drain properly.
5. A carefully placed coating of silicone over screw heads will stop dust from coming in there.
6. As a last resort, as your RV is new, you could contact the dealer and have him reseal the windows or install new ones if these are defective. This should be covered under warranty. It looks like your issue might mean that the type of window you have just doesn’t seal well when you close it.
I hope this helps. I will let you know if I come across with any additional ideas.
Welcome to our blog. Here you can view an entire collection of information, clearly categorized.
Please feel free to write us with a question or comment. We will respond to questions usually within 24 hours. We will research for you and arrive at our best recommendations.
“Hi – can you do an article on slides? I own a 2018 24 ft Freedom TT with a slide and I’m not quite sure what I should be doing to maintain it so it operates well. Recently during a long trip in the rain, I discovered a leak when I opened the slide so a general article would be very helpful. Thanks.”
Tammie
RVlivingfulltiime.com says:
Hi Tammie.
I hope the information I have written below helps you to understand how to maintain your slide(s). I may have told you more than you care to know, but just skip over the parts that you are not interested in. Lol!
In the early days of RVs, the living space in a trailer or motorhome was determined only by the actual length and width of the RV. Manufactures did their best to make use of the space with built in cabinets,and lots of fold out innovations like shelves and even beds.
In the late 90s that began to change when the first slide outs began to emerge. Gradually over the years, the numbers of slide outs in RVs increased from 1,2,3 and now 4 is very common. Some RVs have even more. I have seen a couple of very large fifth wheels with 5 and 6 slides. A recent trend is to make a slide called a “wall slide”. This very large slide can run almost the entire length of one side of the RV and makes for an incredibly roomy feel.
Many RVers have a “love-hate” relationship with their slides. The love the added room and incredibly spacious feel, but hate the fact that slides can be a problem sometimes. They either won’t go our or won’t go in! Slides can also leak.
It is best to give you a brief explanation as to the different kinds of slides and how they work. There may be other variations that I am not detailing here, but the principles will be similar.
Slides in RVs are basically of two types: mechanical and hydraulic
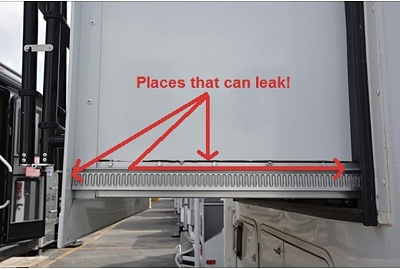
Mechanical slides are propelled by an electric motor. One example of this type of slide is the Schwintek slide that uses a sprocket which ratchets along tracks that are attached to the sides of the slide.
Below are some pictures of what this slide looks like. Note that the arrows show that you should make sure that there is a thin bead of caulking along the upper edge of where this track is attached to the slide as it can leak along this edge.
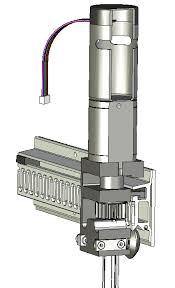
below is a picture of the motor in a Schwintek slide and how it interacts with the track along the slide:
Mechanical slides can also function with cables and with a rack and pinion design.
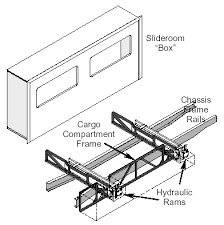
Hydraulic slides also use an electric motor attached to a pump that pumps liquid under pressure in a cylinder that is attached to an arm that pushes and pulls the slide in and out. This is a pretty simplistic description but i hope that you get the general idea. Below is a diagram showing the mechanism, courtesy of Winnebago.
So that now you have a general idea of how slides work, how do you maintain them?
Here are some tips:
Make sure to extend and retract your slides all the way. The seals will not do their job of keeping out water and dirt if they are not flush against the slide wall when it is extended and the inside seals need to be flush against the inside wall when retracted.
The gaskets around the slides are really critical to making sure that you don’t get leaks around the slide while driving and while stationary and with slides extended.
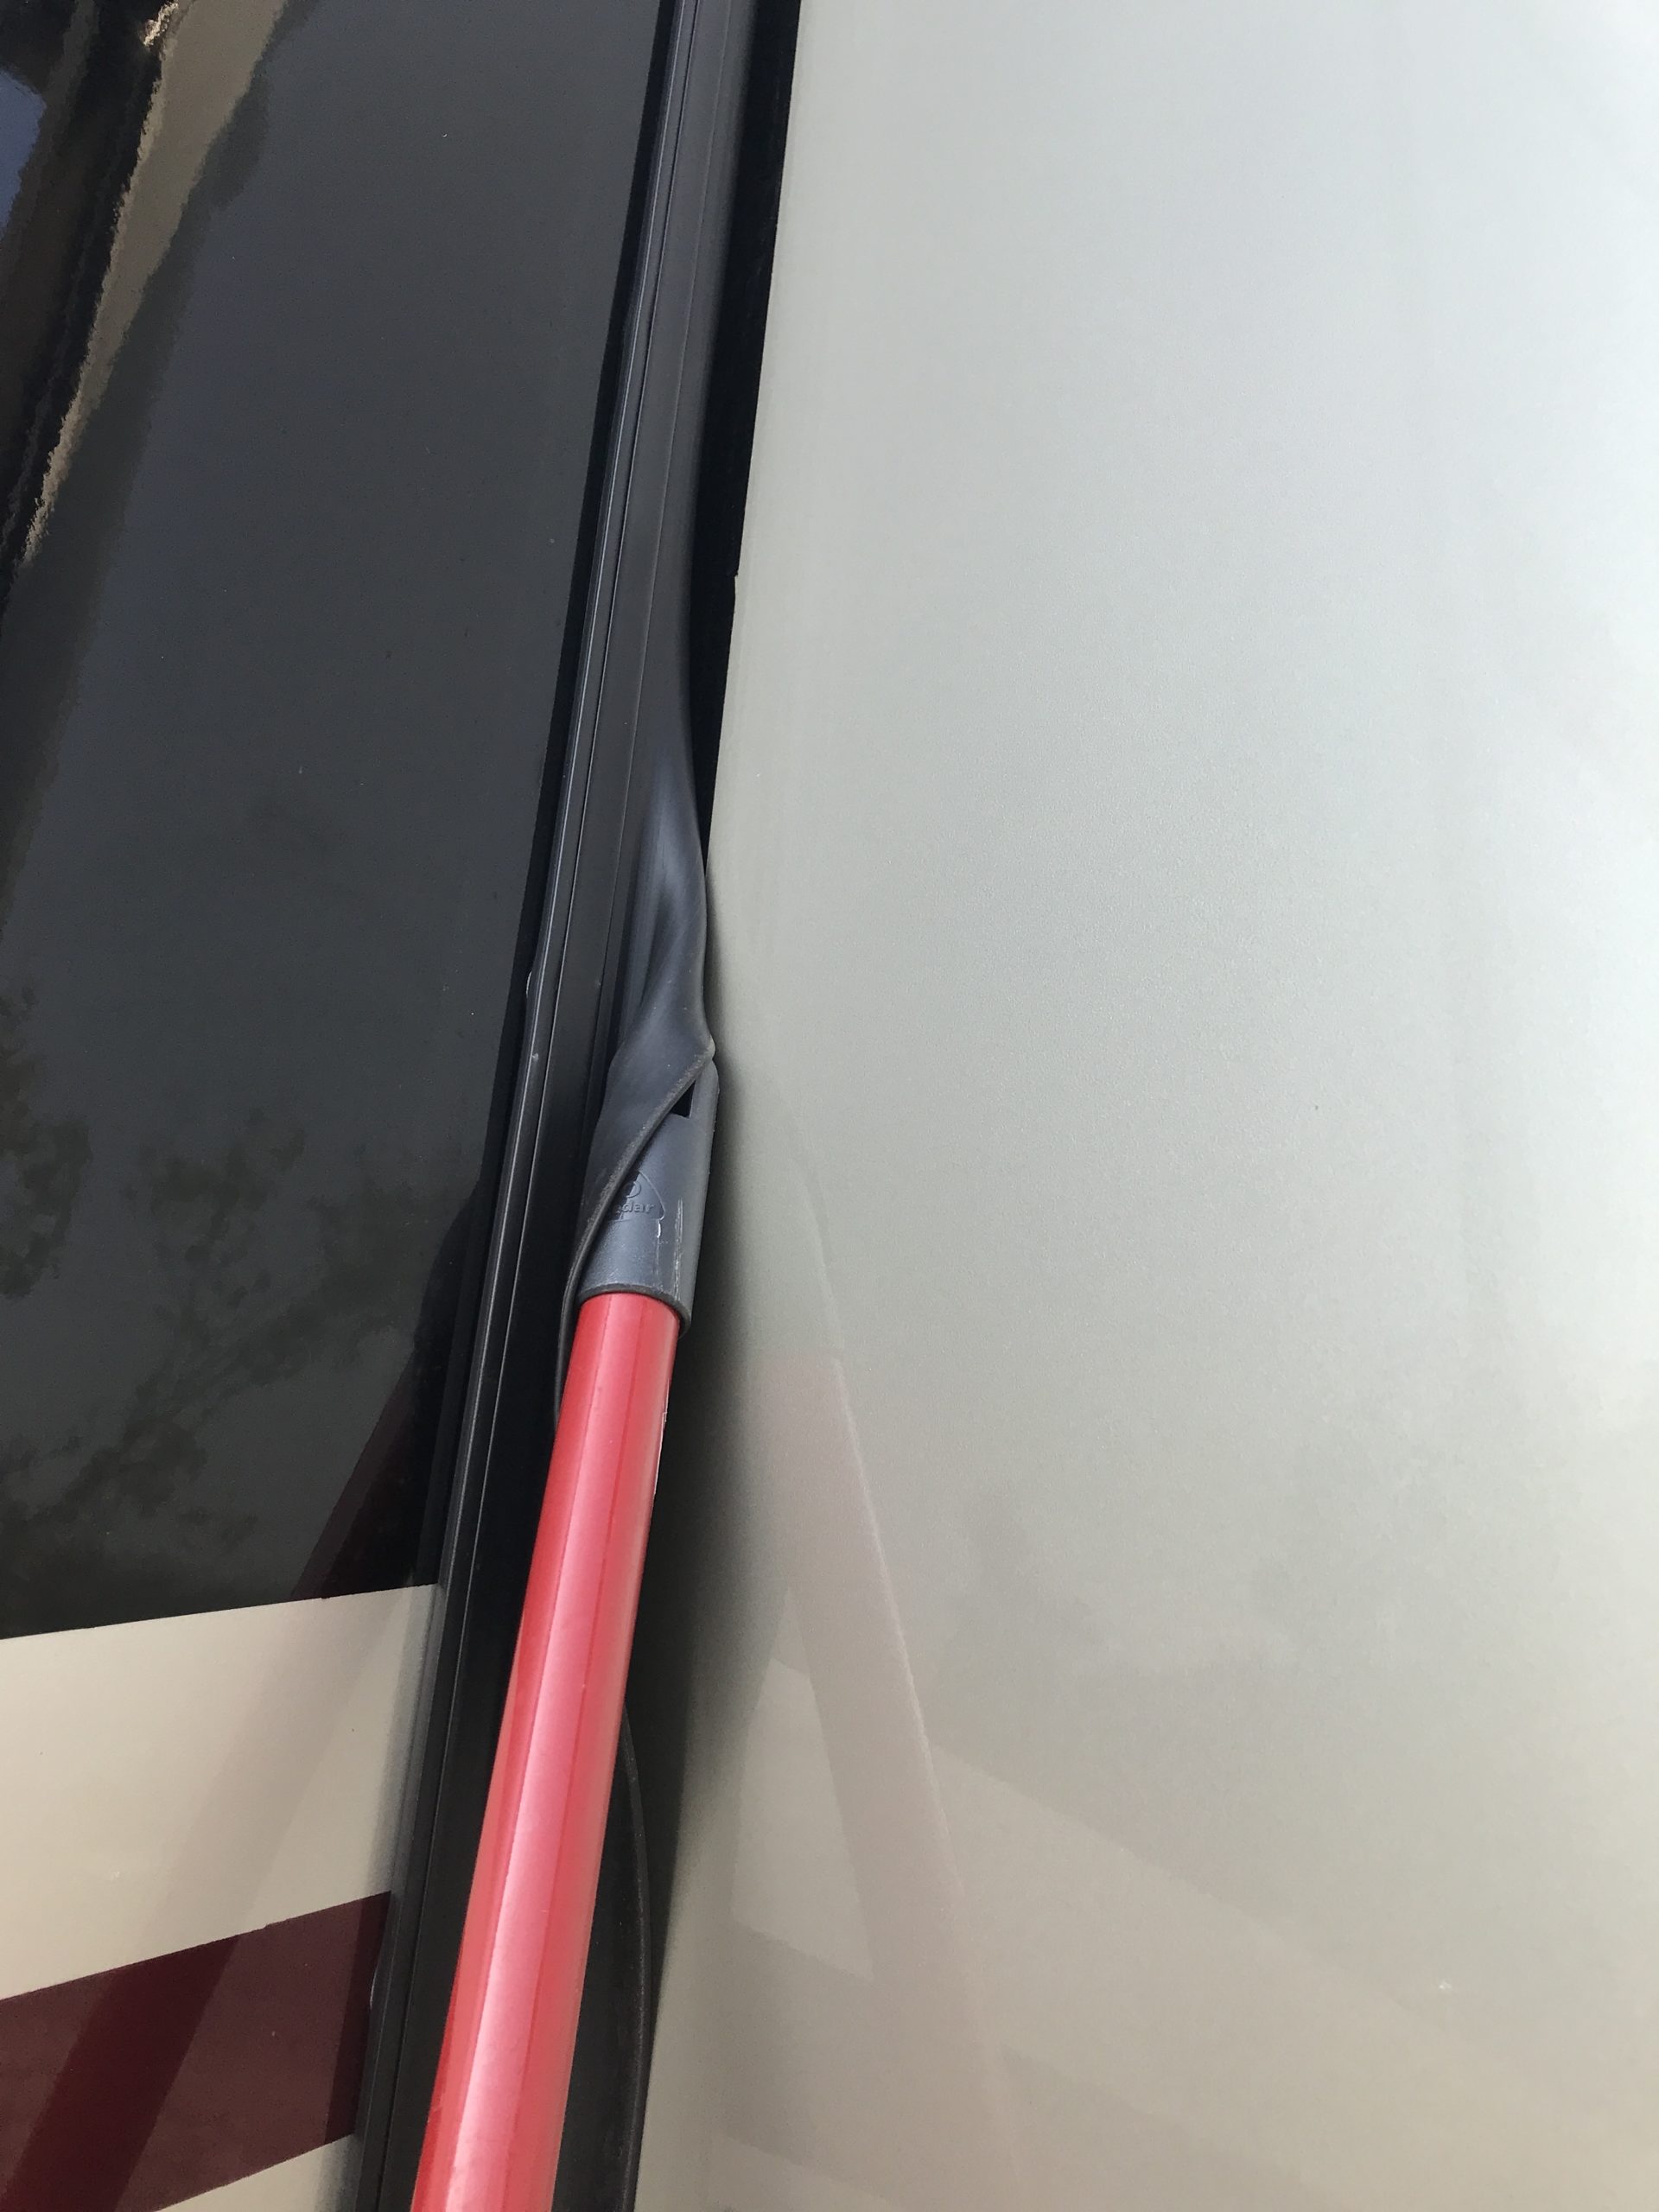
When the slides are extended, it is important for the proper seal for the slide to be fully deployed. It is very common for the gasket to remain folded in after the slide is extended as in the picture below.
The easiest and simplest way to correct this is to take the end of a pole, preferably with a smooth plastic handle end, and put it under the gasket. Gently slide it up unfolding it as you go. See the picture below.
It is recommended that you coat these gaskets with a good quality UV protectant like 303.
It is also recommended that if you have a track on the side of your slide like those in the Schwintec system, you keep the track clean and free of debris.
Sometimes slides will end up pulling to one side or another and will need realigning. In our opinion, realigning a hydraulic slide is best left up to a qualified RV mechanic.
Schwintec slides are different. They get out of alignment because the two electric motors that use the tracks to extend and retract get out of sync. There is simple process that you can go through to realign the slide if it seems to extend or retract unevenly. Below is a great video that shows you how to correct a slide that is out of alignment and to prevent it from getting that way. They refer to this realignment process as “retiming” the slide.
It is a good idea to periodically inspect the mechanical parts of your slides, that are visible, for dirt and debris.
A good spray with a dry lubricant will also help to clean and lubricate. There are lots of specific slide lubrication products on the market, but to be honest, I have not used them, so I cannot recommend any.
I can recommend the PTFE product by WD40 below. This spray is recommended by Schwintec if you wish to lubricate the track and sprocket. This product is good for spraying any exposed parts of your slide mechanism as it won’t attract dirt. You can also use it to clean the parts by spraying it on then wiping it off.
Both types of slides usually use rollers underneath the slide to assist in the smooth movement extending and retracting. In my experience there is no indication from the manufacturer that these rollers need maintenance of any kind. It is very important that you take care, however, not to let any household items that might fall on the floor, find their way into these rollers.
My recommendation is that any other form of maintenance or adjustment to your slides be left to an RV mechanic.
At the conclusion of the “Cellular Router with External Antennae” section of this article, I mentioned that we were currently with Gypsy Wireless and that we had not been with them long enough to reach a conclusion as to their viability. I want to report that they ended up demonstrating that they were as unreliable and as poorly managed with non existent customer service as Nomad Internet. Our service simply disappeared one day and after countless emails and pleas for help, there was no response whatsoever. We canceled our service and made sure that our credit card company did not pay any attempt to collect any additional funds. We strongly recommend staying away from both Nomad Wireless and Gypsy Wireless. At this point we have gone with another company that has a phone number. The service has not been flawless, but anytime there has been a glitch, I have been able to call or text them and have been able to get a real person, the same person immediately. They have always been able to fix the issue. I will update this when we have had several months worth of experience with them.
In the recent RVlivingfulltime Topic Survey, “Internet Access” got the most votes to be the topic of the next article. So, here goes.
Usually I plan to explore a topic, give some background, some possible ideas to pursue and then give a well documented recommendation.
I want to start off by saying that I will not have a specific, solid recommendation at the end of this article as to a specific source for internet access. This topic is very complex and we have had a several month history of trying to come to a good solid way of accessing the internet. We think we have found it, but it is too soon to give a solid, hands in the air, recommendation.
I want to begin by stating that we are not your typical internet users. We would be called, at minimum , “power ” users. Having said this, we do, however, feel that even the normal internet user can gain from the information we have detailed here.
One of us is an engineer working from home. His main task is working in computer-aided design. For those who might not know what that is, it means that he draws very, very complex detailed designs in 3D using the computer. This type of work requires incredible amounts of bandwidth. The pipeline to the place where this information is drawn from and is saved to, needs to be very wide. Speed is therefore very important as is the amount of data that we can use in a month. We have estimated that we use between 200 and 300 GB per month.
So lets talk about where we have been in searching for this kind of internet service. I am going to start from least viable in our experience to most viable.
Cable Internet
It is important to note that we are talking about internet service that is portable, one that will go with you. It goes without saying that no cellular solution will even approach a cabled solution in speed and in amount of data. If you are going to be in one spot for an extended period of time, and you are in an RV park that has it, then cable internet is by far your best choice. Cable internet is also getting cheaper and a month to month agreement rather than a long term contract is very much the common practice. Installation is a snap; just a wire to your RV and to your router. A router costs around $125. and can be used for all sorts of different suppliers, depending on where you are and what is offered. We recommend you buy one rather than “renting” one from the cable company. This makes more sense economically. This is the one we purchased.
Satellite Internet
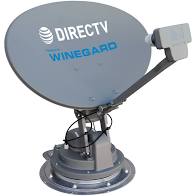
Satellite internet still has quite a ways to go before it is an economical solution in several ways. First of all you have to buy the equipment which can run upwards of several thousand dollars. The service itself can run from $50 to $500 a month. One of the problems is that the technology is changing and you could spend $4000 for a really beautiful automated roof satellite dish, only to discover that it is obsolete in a couple of years. Also the speed at the present time is not that much better than cellular and there are of course limits on how much data you can use. We have a beautiful satellite dish on our roof that came with our motorhome. It is fully automated and raises up off the roof on command. Totally useless. It is for Direct TV which we do not use. It cannot with any modification be used for satellite internet.
Local Hot spots
This solution, we have found through lots of experience, is the least reliable and the poorest in quality. To be honest, we have only been in one RV park in lots of travels that had a somewhat decent WIFI and internet access. This park was the KOA in Petaluma, California. It was truly amazing and unexpected. Use of “Tango Internet” hot spots we find to be a complete wast of time and money as were Xfinity or Comcast public hot spots.
Phone Hot Spot and Portable Hot Spots
First of all, let’s start with the two lowest common kinds of mobile internet cellular service; the hot spot on your phone and the portable hot spot “hockey pucks”. Both of these two services rely on your phone service and are limited in speed and in amount of data. In our exploration, the speed, if there is a good connection, is workable and perfectly fine for the average user. It is not great for online gaming, or downloading movies. It is passable for our power user. The biggest downside is the data limit. Most of the more expensive plans offer a maximum of 40GB per month. Obviously I don’t have time here to explore all the different cell phone carriers and their plans. They change very frequently so trying to do so would be foolish anyway. Here are our conclusions on these two choices, the phone hot spot, or dedicated portable hot spot, as a solution for internet access:
either one of these two choices is only as good as your carrier’s coverage
the only way to best assure coverage would be to buy a portable hot spot for each of the three major carriers, Verizon, At&t and Sprint/T-mobile and use the one with the best signal in your location. Obviously this is not a very economical choice.
if you are an off-the-grid kinda person chances are you will have no signal period. Then satellite internet is probably your only solution.
according to all of the major carriers, the reality is that there is no “unlimited data” plan. The fact is that they throw that term around but after you use a certain amount of data, you are “throttled” meaning your speed is reduced to maybe 3g. Always read the fine print right under where it says “unlimited”.
the coverage for either the portable hot spot or your phone is somewhat limited in remote areas. The number of bars that you get, by the way, is directly related to the speed of data that you are going to get.
I will have some recommendations as to apps that you can get for your phone or tablet that will help you determine in advance of getting to a location what your coverage might be for each carrier. I say “might” because this data is based upon user input. You should also use the carrier’s coverage maps to cross reference even though many times these maps are wishful thinking. There are many factors that can cause an area to have a poor signal.
Cellular Router with External Antenna
This ended up being our final choice after months of struggling with the alternatives. The engineer in the family was now working from home and we really wanted to travel and explore but he needed to be able to work. He decided that cellular service speeds could work with some patience. Most importantly we found a company that offered an unlimited, unthrottled data plan.
So we contacted this company in Virginia. This resource was recommended by a fellow RVer on a Tiffin Facebook page. We did considerable additional research regarding this company before we contacted them.
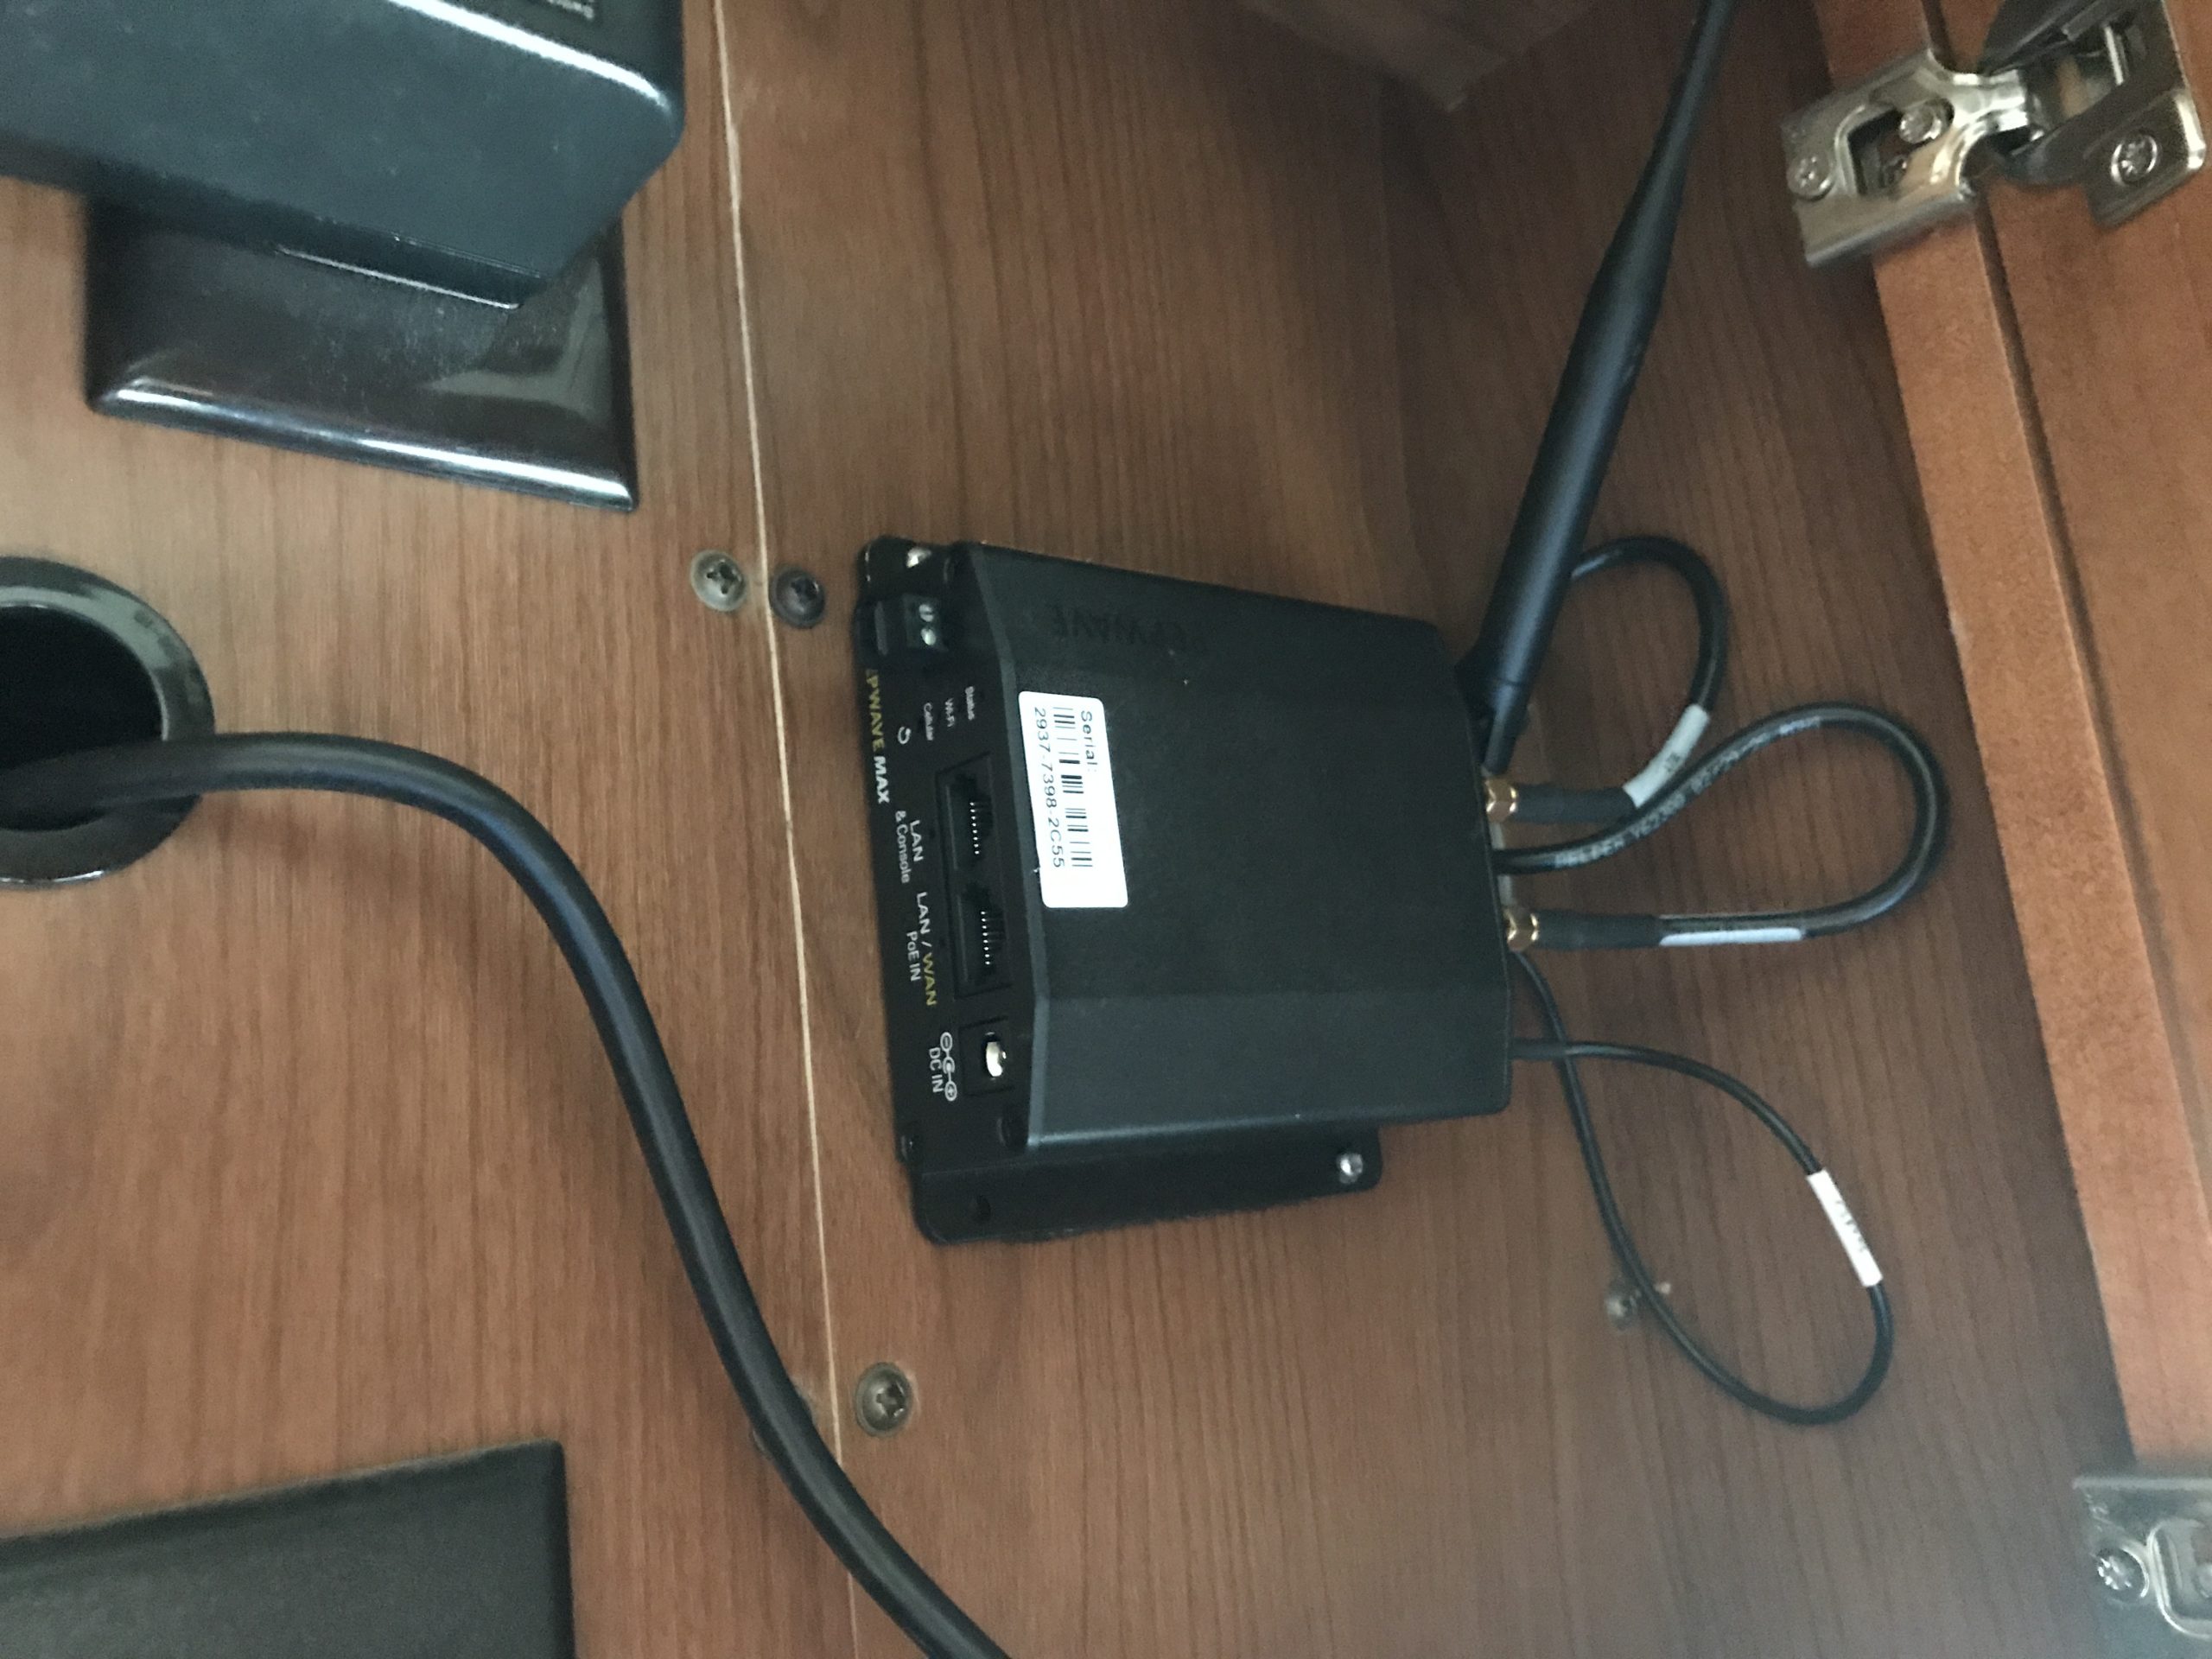
They sold us a Peplink Router and external antenna and an unlimited and unthrottled plan with T-Mobile. The hardware was about $900. and the monthly plan was $99. with two months deposit. We installed the small, round antenna on the roof and ran wires down to a front- located cabinet where we mounted the router. Some observations:
installation was very simple, the router was all set up and all we had to do was install the antenna and attach all the wires. The router runs off 110V so you would need to have your inverter on if you were not attached to power.
the router receives the cell signal and broadcasts the WiFi throughout your RV so it is like the portable hot spot. Because of the external antenna, however, it is much better at receiving a signal.
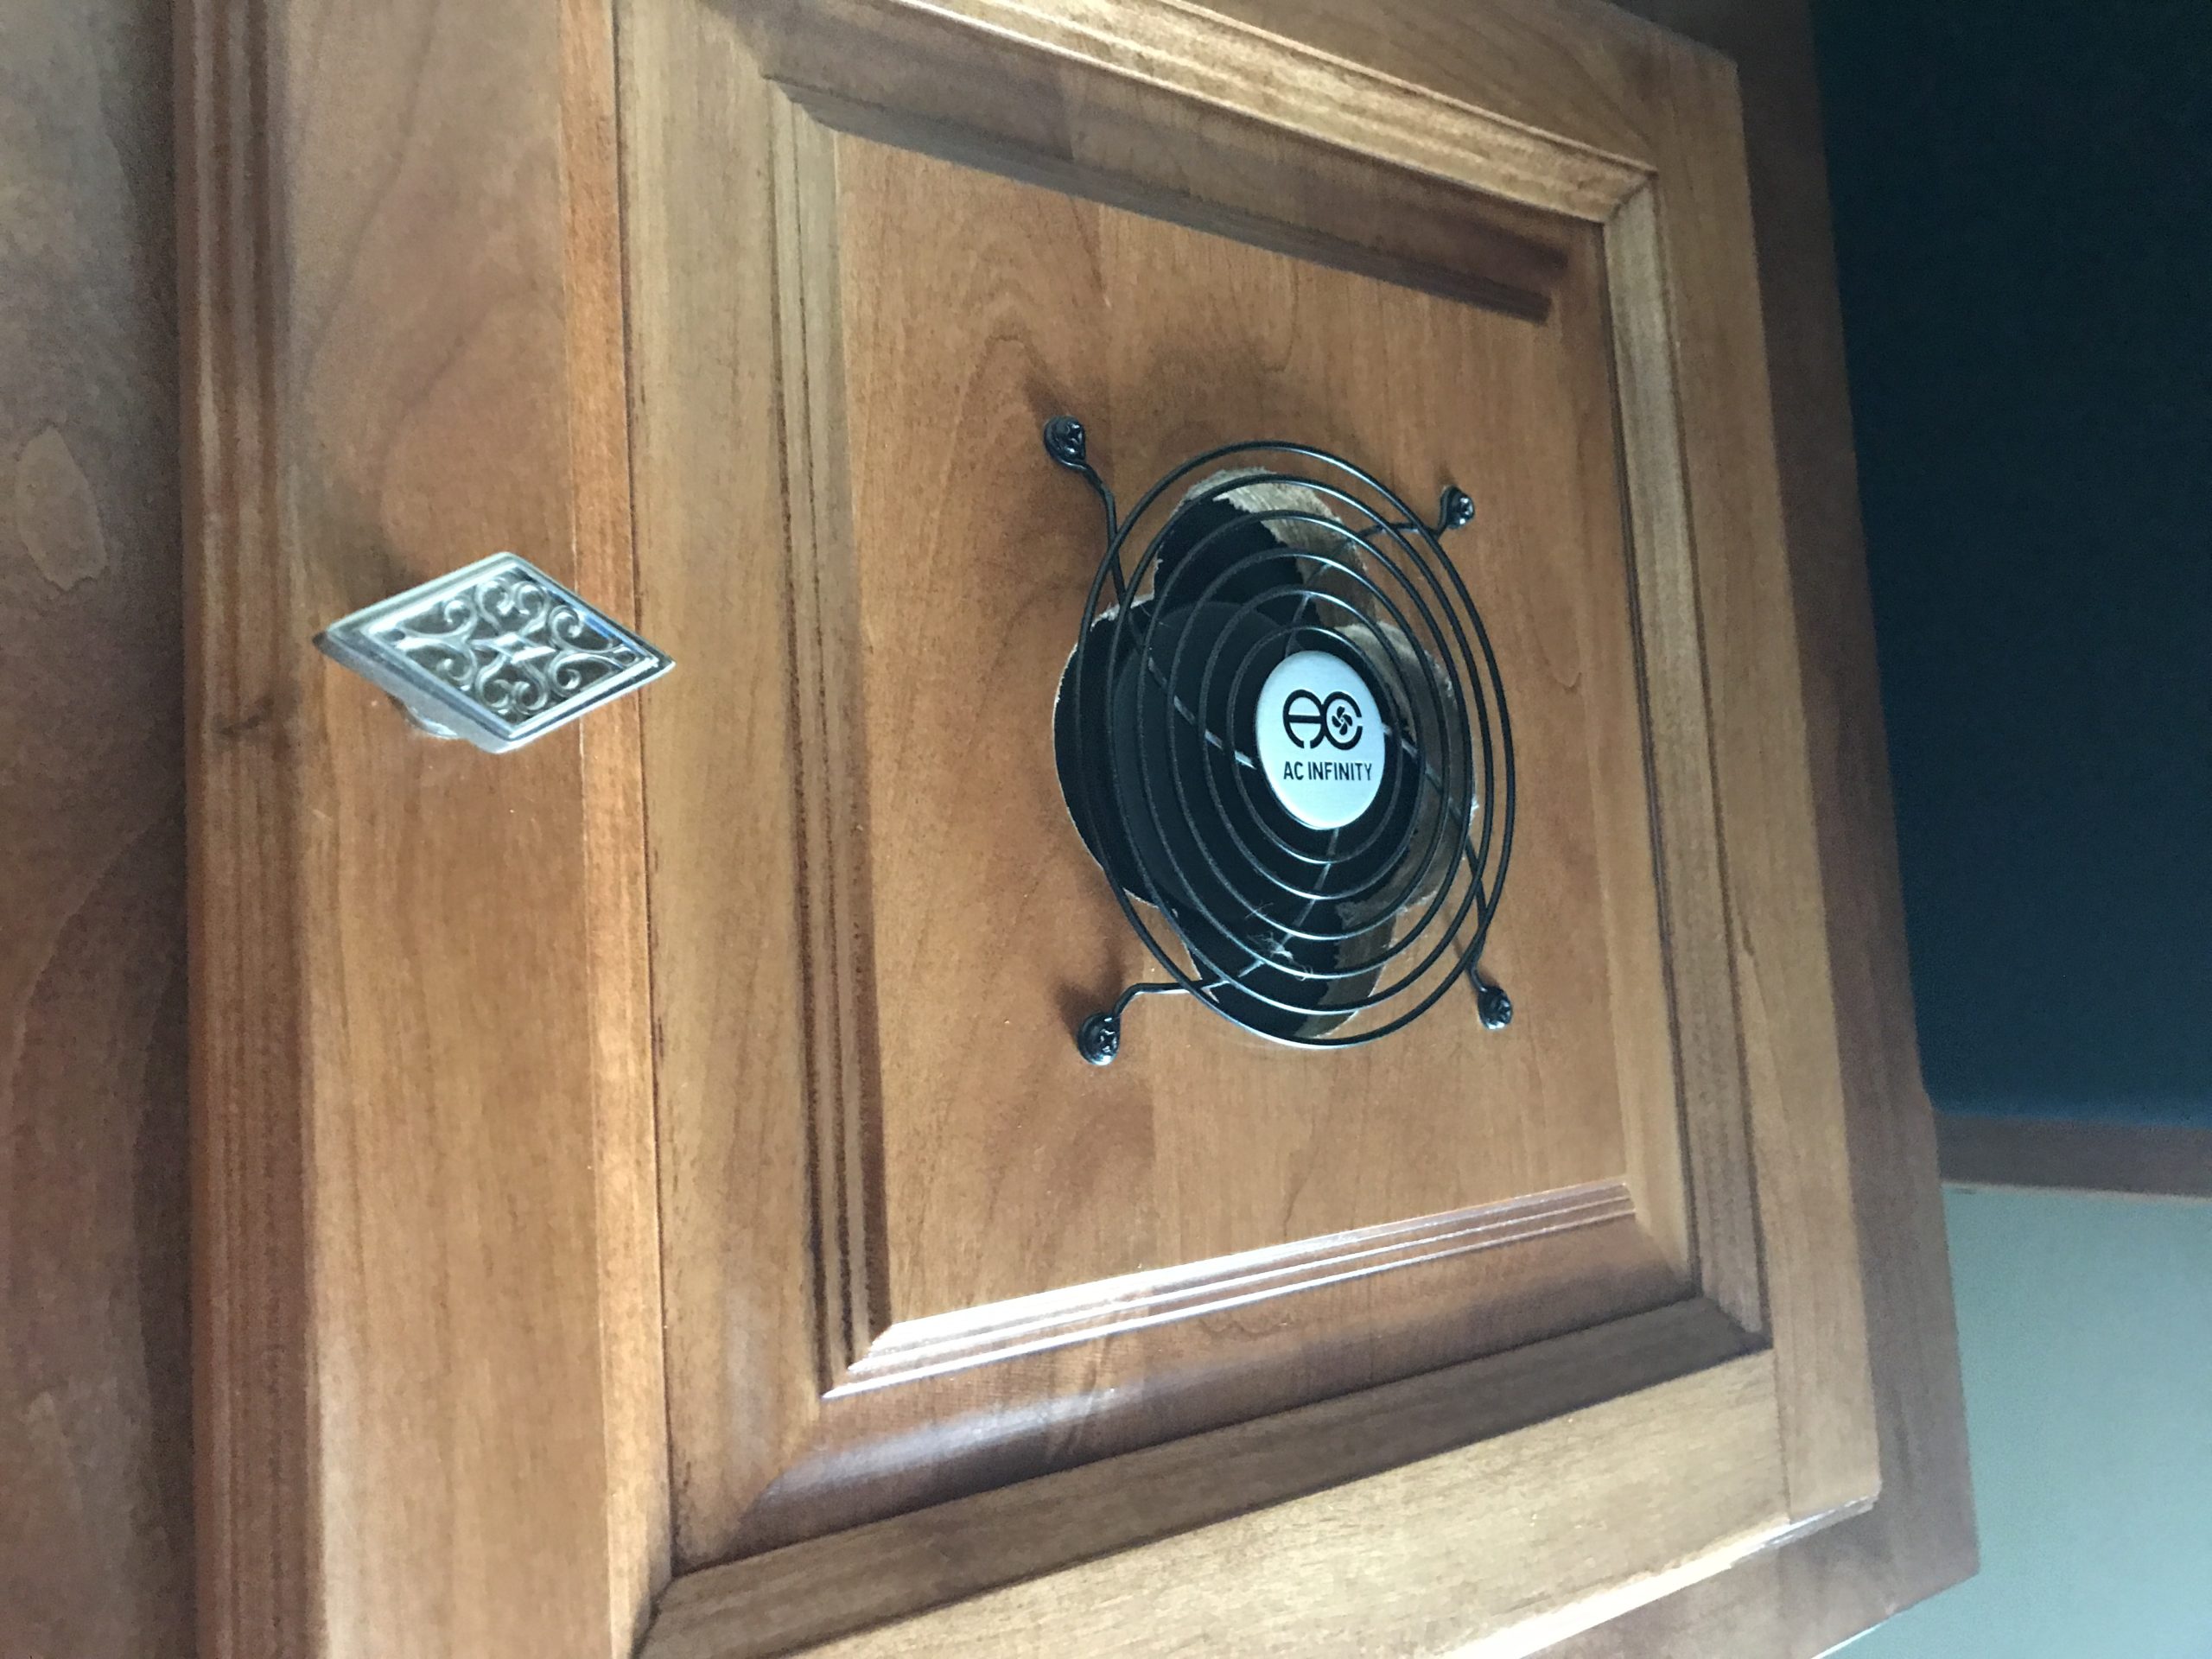
the router is very small, a little larger than a cell phone, so it is easy to find a place for it. It gets quite warm, so we cut a hole in the cabinet door and installed a small fan.
Peplink Router
the router has a place for 2 sim cards so you could easily have access to two carriers that you can alternate back and forth using.
the hardware and the T-Mobile plan worked great while we were at our site in Pleasant Hill California, outside San Francisco.
Below are the Peplink Router and Mobile Mark Antenna that we purchased. Amazon has them at a good price.
But the story does not end there, unfortunately. We soon discovered that as we began to travel, T-Mobile has an unreliable signal and coverage was not good in places we liked to go (We were traveling in the Pacific Northwest at the time). The customer service from the Virgiinia was excellent. They have a phone number you can call and they were always very responsive to our needs.
As a result of the unsatisfactory coverage, however, we terminated our services with the Virginia company, as at the time, they did not offer another unlimited, unthrottled plan. As a side note, I called the company today to get an update on their services for this article only to find that they no longer offer an unthrottled plan from any carrier.
So that is the main challenge, it appears that if you go direct to a major cellular carrier, none will sell you an unthrottled plan.
I continued to research before we terminated T-Mobile and found a third party company that offered 3 unlimited, unthrottled plans with each of the major carriers. I researched and researched and this company appeared to have a very good reputation. The company is Nomad Internet.
Some observations:
I don’t understand how third party carriers can offer plans from the major cell companies that they don’t offer themselves. These companies aren’t scams as we can attest.
we ended up purchasing an At&T sim card from Nomad. The plans with other two carriers required buying a special cellular router and At&t was the only one that you could sign up for that could be just a sim card only. (Obviously we had our own router and antenna). The plan was $129 a month.
we were not happy with the customer service from Nomad from the beginning. They do not have a number to call and they take for ever, sometimes days, to respond to a chat request or email.
for some reason due to changes in services or something, they started sending us replacement sim cards with no explanation and no correspondence what so ever.
they did indicate the cost of the plan was going to go up to $149 in a month.
The coverage was much better with At&t, although as I indicated above we have found many areas where it is not good. But it was still considerably better than T-Mobile.
again we were not happy with the customer service and the hike in price so we changed companies once again.
At this point we are now with Gypsy Wireless, again recommended by another RVer. I had purchased a prepaid At&t sim card from Amazon a while back, and was able to sign up with them on the internet just giving them the card number and the IMEI number of our router. Their plan is $75 a month, is unlimited and unthrotted and appears to be the exact same signal as the At&t that we had with Nomad. So far, Gypsy Wireless has responded very quickly to all my questions and emails ,even after we signed up. They don’t have a phone number.
General Conclusions:
Cable internet is not an option for those RVers who travel frequently in their RVs. If you are an RVer who stays in one place for long periods of time, cable could be an excellent solution. It is extremely fast, inexpensive and has unlimited data.
Satellite internet seems to be expensive initially and also on a monthly basis. It is, however, one of the few options that gets a signal almost anywhere in the country and is not tied to a cellular provider. There is still the challenge of getting a clear view of the sky for a good signal.
Local hot spots including RV Park WIFIs in our experience are unreliable and of poor quality. Planning your trips around RV parks that have usable WIFI would be very difficult at best.
Portable hot spots and phone hot spots are a reasonable alternative for the average user. The limitations of their use include limited range without an external antenna and data caps.
truly unlimited, unthrottled internet is really hard to find and may not be around long.
we have no idea how long this will last with our present supplier.
we really hope that if you are working at home and need lots of data that our detailing our experience will help you in some way determine how to proceed.
if you are just a normal internet user, a cellular router with external antenna is still a good choice as you will find you will get signals in places your cell phone or portable hot spot will not.
we cannot, at this point, recommend Gypsy Wireless as not enough time has passed. We have been with them for less than 2 months.
we do feel like the hardware we purchased was a fairly good investment. It is not 5G capable and we knew that upon purchase.
please don’t hesitate to write us for more information or suggestions.
internet streaming TV
As a final word we wanted to give you a recommendation for television. This recommendation is more useful if you have an unlimited, unthrottled data plan.
Use this generalization as a guide. An hour of standard definition streaming TV or video uses roughly 1 GB of data. An hour of HD video or TV can use around 3GB. So you can get an idea of how much TV you can stream from your hot spot or phone if you have a 40GB per month plan.
At some point in my RV career I had Direct TV with a big dish on the roof. This was some time ago and i would never do it again. The cost is prohibitive as far as we are concerned. We have for some time now been streaming our video using an Amazon Fire Stick. It is an inexpensive product you purchase outright. Our observations:
even with a portable hot spot or using the phone hot spot, the Fire Stick running off your wi fi will do great with HD TV. We have found it will get a great HD picture with speeds as low as 5 Mbps(mega bits per second)
there is no on going cost per month for the Fire Stick. If you are a Prime member ($12. a month) you get a bunch of movies and tv shows included. The Fire Stick serves as a portal for Netflix, Show Time, Stars and many other content providers
we also have You Tube TV that runs through the Fire Stick. It is about $50 a month.
Over all Recommendations:
we recommend RootMetrics CoverageMap on the Apple App Store(not sure of Android version). This app helps you determine what the strength of the signal will be for each carrier in any area of the country. It is based upon user input. We found it to be a pretty good indicator depending on the number of people who contributed to the rating. This app also has a great speed test of your connection.
we recommend Coverage LTE finder for IOS by VeeApps(not sure of Android version). This app shows you coverage of any area of the country by carrier and is based on the number of cell towers in the area. It shows you each cell tower and rates its speed.
we recommend Speedcheck by Etrality GmbH in the App Store(not sure of Android version). Allows you to check the speed of your internet connection.
we recommend the Amazon Fire Stick and Amazon Prime.
Right now many roofs have lots of ash from our many fires, do you have any specific cleaning advise for getting ash off of roofs and coach without damage. I believe ash may be very abrasive?
“I am having problem with my suburban sf30 furnace I have checked gas valve the wires are good but it won’t fire an heat the board is new igniter is to.”
“I found some greasy grey powder in the back of the drawer under Norcold fridge in our 1996 Itasca Sunrise. Any ideas about what it could be? Fridge is running fine on electric mode and don’t often us gas.”
“This has developed over the last 3 weeks but I need a reliable second opinion. I live full time in my RV and am at an RV resort with full H/U. I keep my black tank closed until I empty it, which I do weekly. The handle has gotten extremely hard to push/pull and I looked at YouTube today for some help. One recommendation was to use “3 in 1” silicone spray so I ordered a can. The video showed the man spraying the rod of the handle and THEN he sprayed the inside of the black tank outlet and the “gate” part of the valve. I’d prefer not to disconnect my sewer hose. Another video showed pouring vegetable oil down the toilet when the tank was empty. I was sort of leary of that because U wasn’t sure about the sensors. Please give your expert advice!! Thanks in advance!”
“Our GFCI in the bathroom works at times and then will not work. Recently the television in the bedroom stopped working as well as the GFCI. Could the GFCI not working be related to this? If so, how can we check or change the GFCI? Can it be a DIY?”
This section is all about Electricity in your RV, from the box on the RV park post to your generator. There is a lot to cover here, so keep following as this section expands.
This section is all about refrigeration in your RV, from older gas/electric refrigerators to the newer, all electric “residential” refrigerators. There is a lot to this section. Come back to visit and watch it grow.
There is a lot to say about maintaining the exterior of your RV. Washing, waxing, lubricating door locks and much more. Check back on this section to watch it grow.
An obviously important part of your RV is the “water closet”, the “loo”, the “privy”, your RV toilet. In this section we are going to work to take some of the mystery out of this mechanisms so that you can properly take care of it and have it be a dependable part of your home on wheels.
There is no question that the typical RV toilet is different in many ways from the toilet you have in your home. It is definitely more complicated, more delicate, works in different ways and requires a totally approach to maintenance and repair.
I meet RVers all the time who approach the maintenance of an RV toilet like a home toilet, using harsh chemicals to clean and maintain it and its partner, the black tank.
In this section we are going to discuss both the RV toilet and the black water holding tank, how they work, how they are different from brick and sticks home toilets, and most importantly how you take care of both.
The RV Toilet
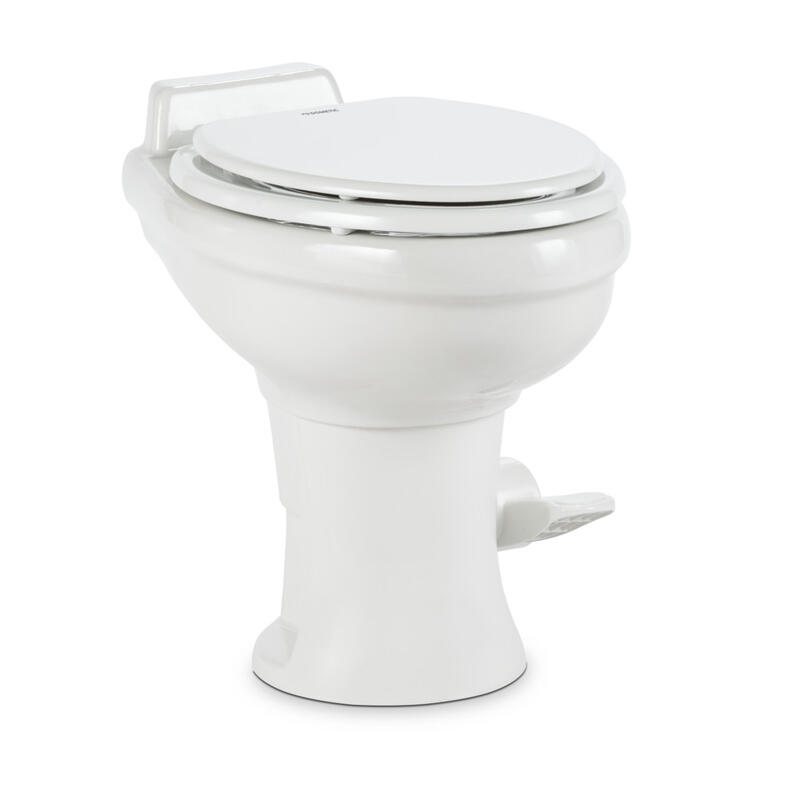
RV toilets basically fall into two types, the regular manual toilet with a pedal on the front or side and a mascerator toilet which is an electrical toilet.
The regular, manual toilet :
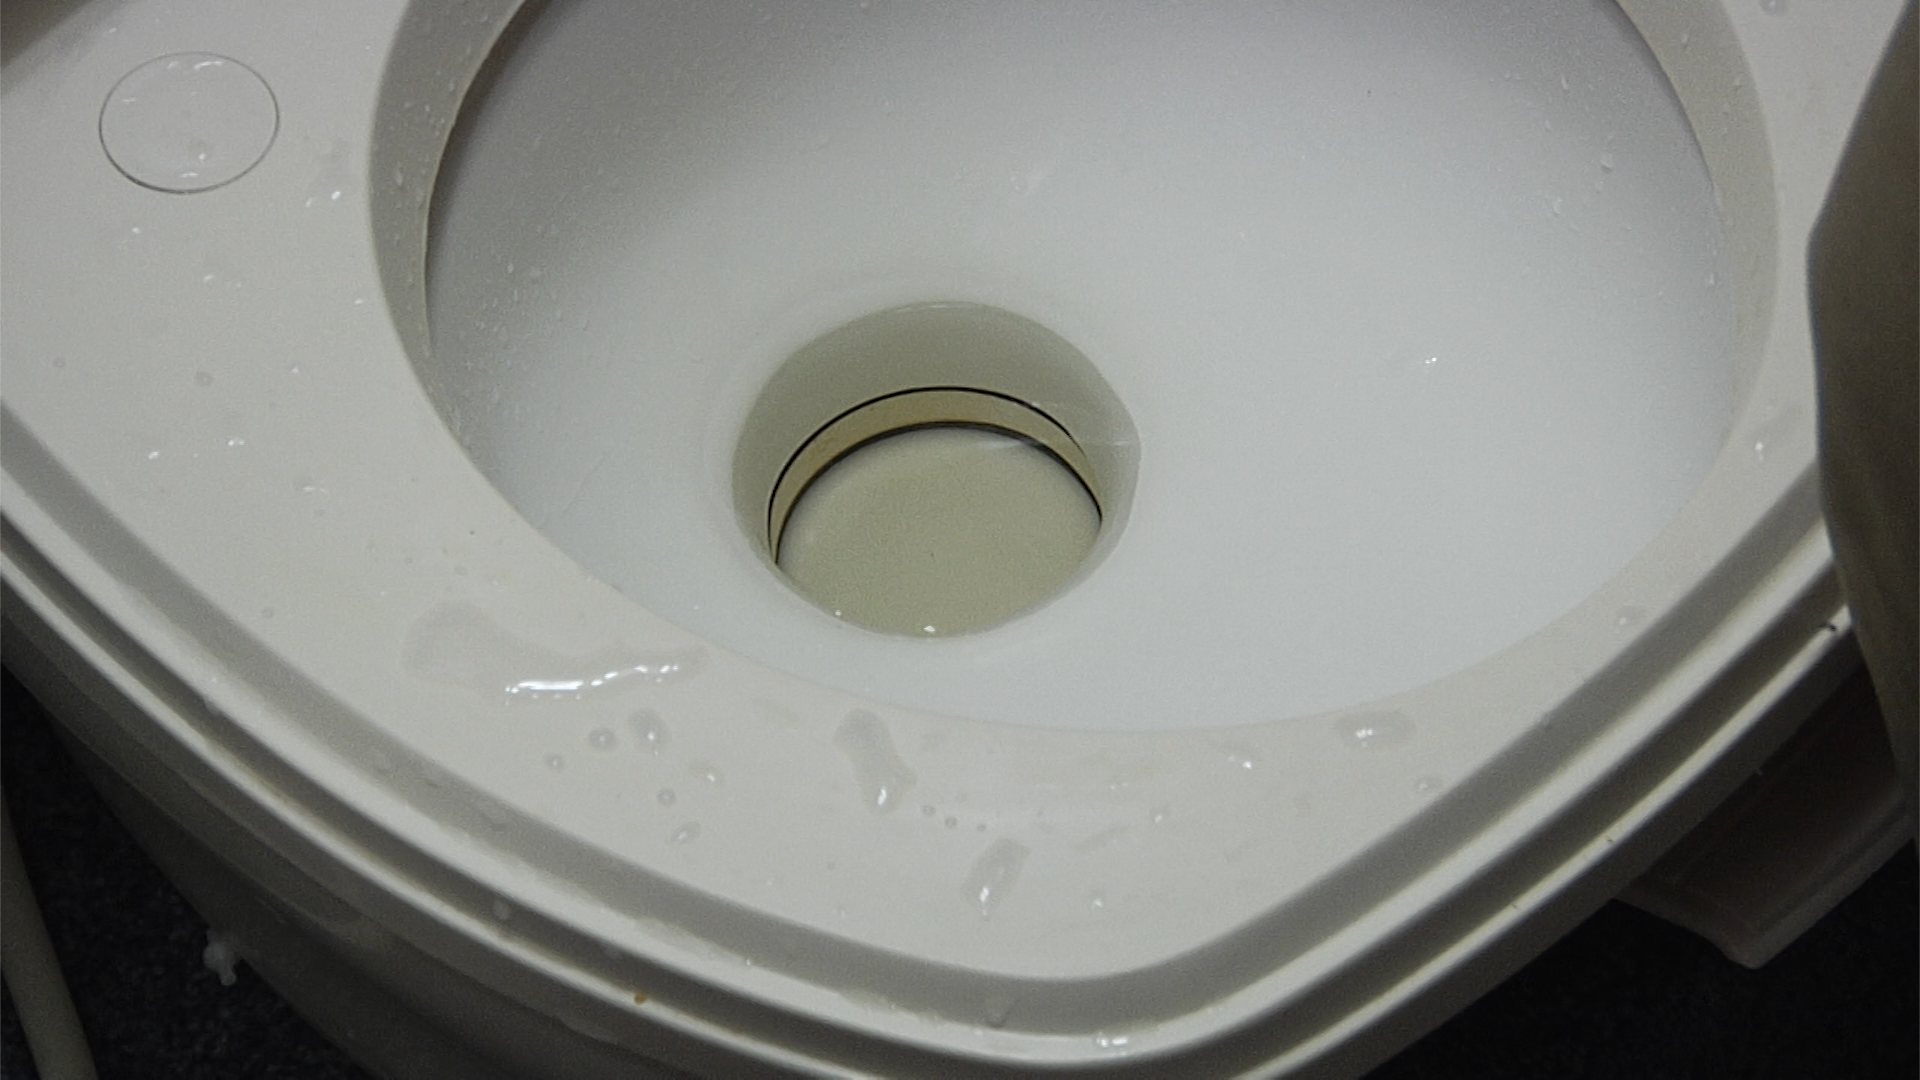
has a curved piece in its center which stays up against a rubber gasket when the toilet is not operating.
usually has about an inch of water in it at all times to prevent black tank gasses from coming out into the room.
when the flush pedal is pushed down, the valve opens to the black tank, and water from either the fresh water tank or the local water source is allowed into the tank to rinse the bowl. The inlet valve that controls when the water enters the bowl, in my opinion is sometimes the source of leaking outside the toilet.
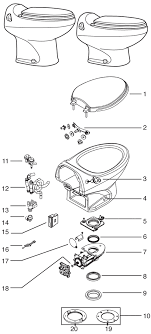
has many parts, several rubber gaskets and valves.
is much more complicated and delicate that your regular house toilet.
the parts often the most susceptible to damage and in need of replacement are the rubber gaskets.
It is our recommendation that you never use any chemicals in or on an RV toilet that are not specifically made for it. This means no bleach, no toilet “wands”, no Clorox tabs or any products made for the regular sticks and bricks toilet.
There are a number of products available that you can use to clean and disinfect your toilets that will work with the bacteria in the black tank. We have tried many of them but have found this one works well.
You should also never use a stiff brush of any kind on the area around the valve blocking the inlet to the black tank. Brushing can damage that gasket.
This leads us to some important things surrounding the black water tank.
there are two types of holding tanks in an rv, the black water tank and the gray water tank. The black water tank holds the outflow from the toilets only. The gray water tank is water from showers and sinks.
the the early days of RVing the chemical formaldehyde was the main component chemical used in holding tanks to reduce the smell. It simply preserved the contents of the tank and did not allow bacteria to grow.
that chemical has now for the most part been replaced with considerably more environmentally friendly alternatives that work much better and are better for the environment.
these new alternatives are based on a bacteria model which encourages the break down of the solids and paper in the black tank. This process allows more complete emptying of the tank, and helps preserve sensor operation.
we strongly recommend that you do not use tank additives that have formaldehyde or other chemicals. You should only use additives that are based upon the bacteria model.
this is an example of this type of product, we use it and recommend it.
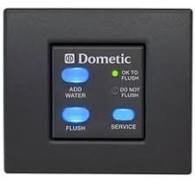
The second type of RV toilet is the macerating toilet.
This type of toilet is typically used in an RV where the toilet is a ways from the inlet of the black water tank.
This toilet has an electric motor that basically grinds up waste and paper, adds considerable water and then forces it down the piping to the black water tank.
Macerating toilets use considerably more water than a manual toilet.
They also can glog some what easier than a manual toilet.
All the same cautions described above apply to macerating toilet.
At this point i would like to discuss toilet paper. Lovely topic I know but if you are a member of any only like RV group it is truly amazing the types of discussion that can ensue when this subject is brought up. There are two extremes of the discussion.
At one end of the spectrum are those that believe that you should not put any toilet paper in the system and use covered waste basket for toilet paper. At the other end are those that believe any regular toilet paper is perfectly fine.
It is our opinion and experience that neither of these views make any sense.
You do not have to buy special RV toilet paper.
Any single ply rapidly dissolving toilet paper is fine.
The absolute best way of determining whether a paper is going to dissolve and is suitable is to take a few sheets, place them in a glass of water. Then putting your hand over the glass, shake it for a few seconds. If the paper disintegrates quickly it will work in your RV toilet.
You should never put any thing else in your RV toilet. Do not put sanitary wipes in your RV toilet.
One final word concerning the gray water tank.
In our motorhome we leave the gray water tank valve open and allow water to flow out as it comes in from sinks and showers.
We do not put cooking oil or grease of any kind into our gray water tank
We have a fine strainer in our kitchen sink to prevent food particles of any size from entering the tank.
A day or so before we are going to empty the black water tank, we close the gray water tank to allow water to build up
When we empty the black, we keep the gray closed. We never open both at once so that we do not contaminate the gray tank with any black water.
When we have finished emptying the black water tank and flushed the tank for 20 minutes with fresh water, we then close the black tank valve
At that point we open the gray water valve allowing the gray water to purge the sewer hose going from the RV to the sewer inlet.
Living full time in your RV means that you are performing the tasks of every day living just in smaller quarters and with different appliances.
I have frequently heard from people new to full timing say that they are afraid of cooking in their RV as they are not used to using a convention/microwave oven, which many RVs have. As a result of this, I thought that we would start with my experiences with this combo oven. I am hoping that this will encourage subscribers to chime in with questions and comments about their experiences and suggestions for making great RV-cooked meals using this versatile appliance
Sharp Oven Oven
First off I want to confess that I am not a great nor a very experienced cook. We are newly “pescatarian” (a vegetarian who eats fish, eggs and dairy) so this means I have had to learn to cook. I am, however, good at following recipes and I am organized in the kitchen. Here are some things I have learned:
One of the things right off the bat that you learn when doing any kind of meal preparation in an RV is you have to be organized. This means knowing where stuff is that you need and knowing where you are going to put things as you use them. It also means that you clean and put things away as you go. This is perhaps the most important thing.
When I am going to cook something, I take out all the spices first and following the recipe I measure out what I need for each spice into little glass cups or very little bowls. Cappuchino cups are great for this. I combine any spices that are going to be used together. Then I put the spices back in the storage rack. So before I start cooking I have these little containers of spices all lined up in order.
As soon as I have a couple of things in the sink, I wash, dry and put them away. There just isn’t room to let cooking stuff pile up.
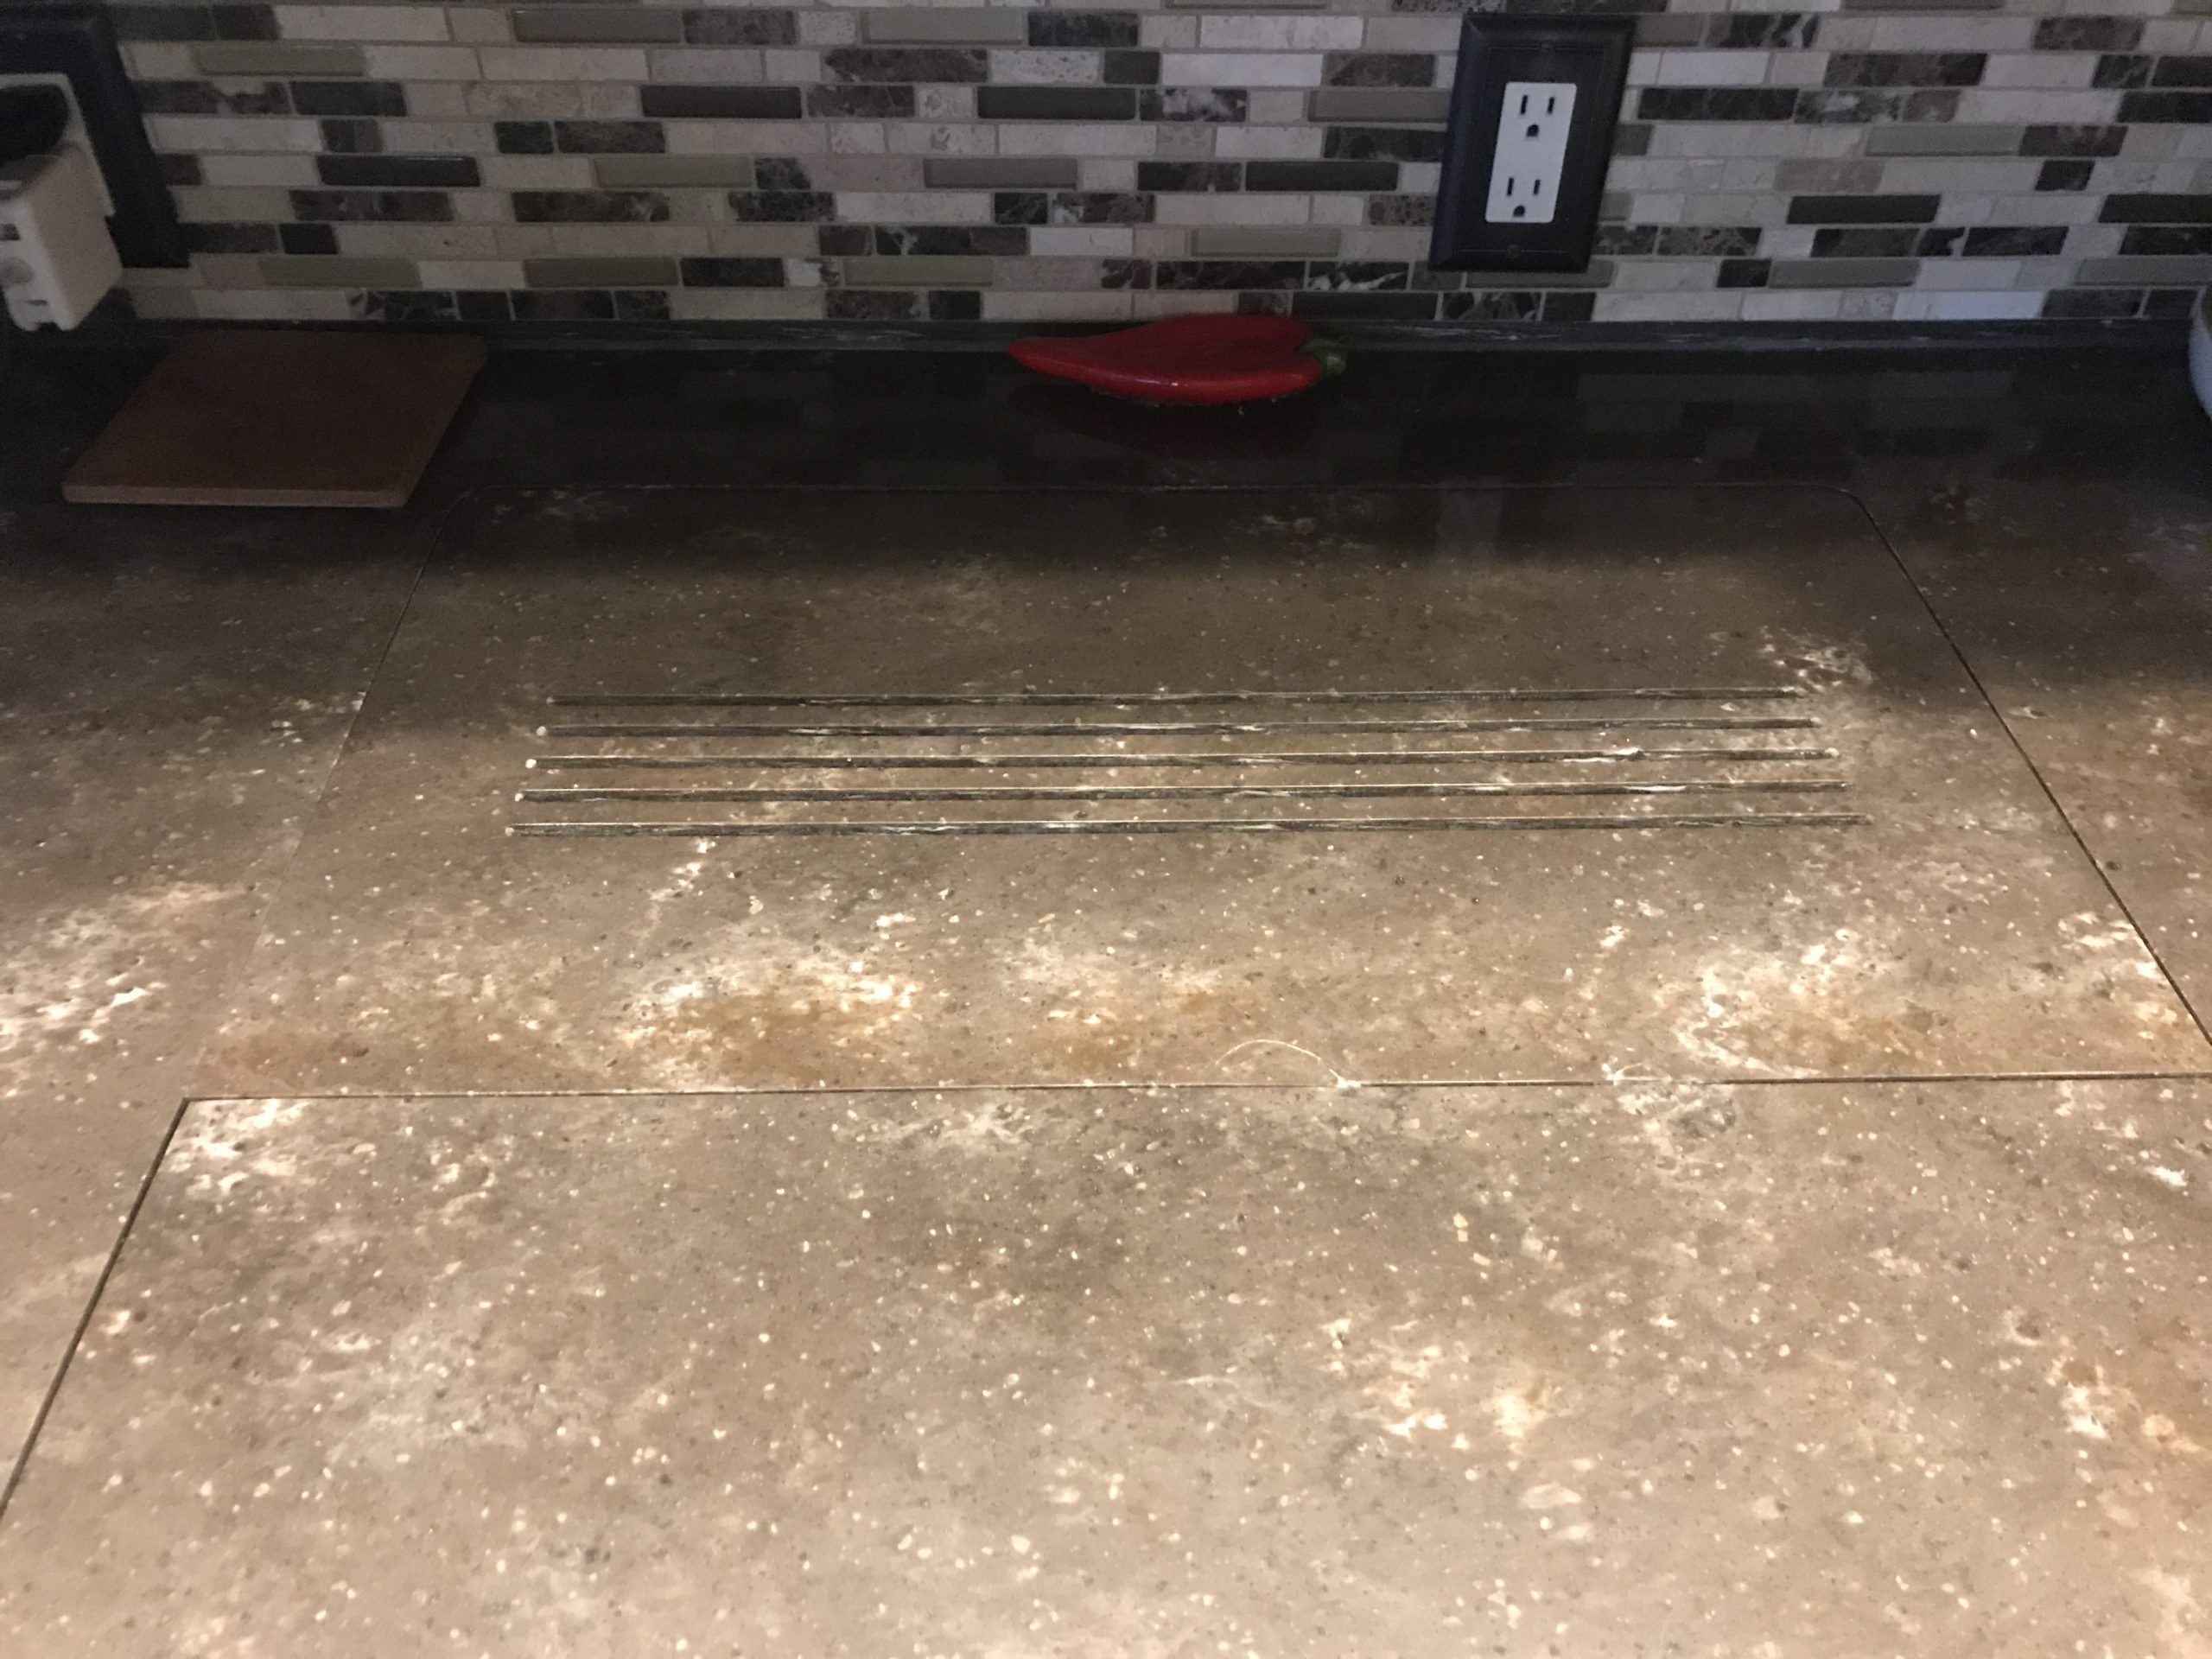
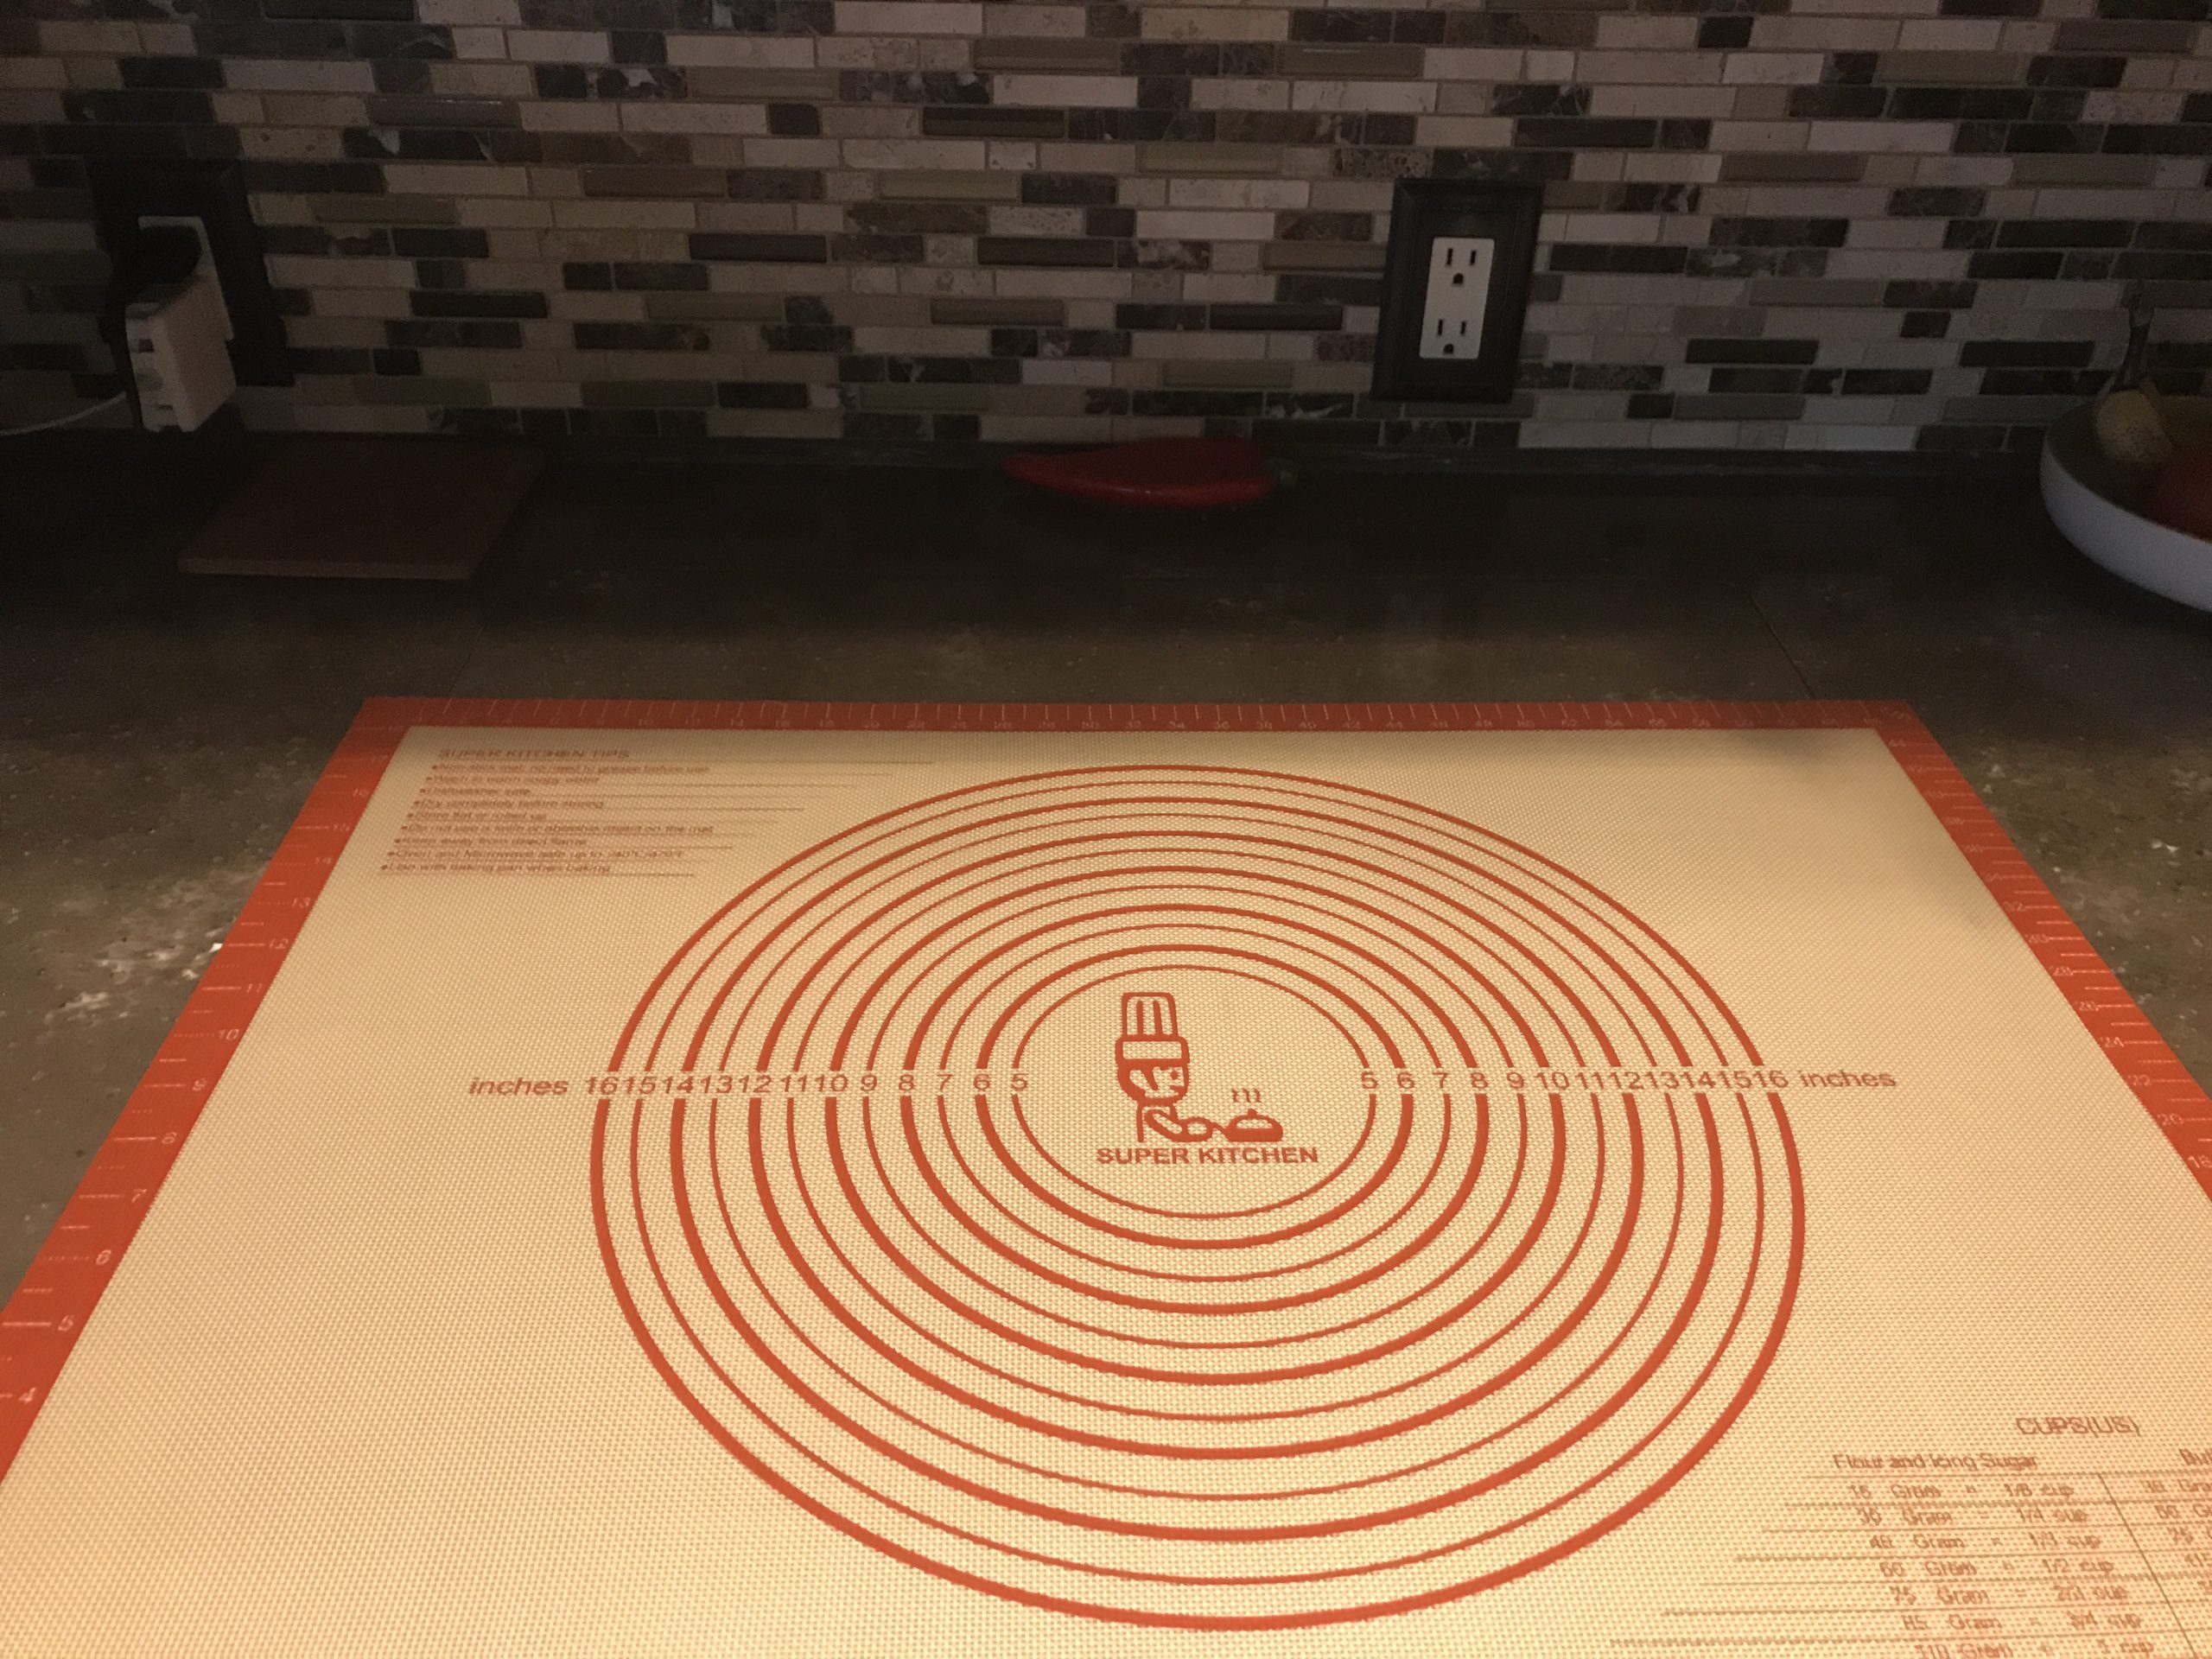
Because our induction cook top is under a cover, after a lot of experimentation I bought a silicone mat to cover up all the vents and spaces between the cover that collect food, flour etc from cooking. It’s a simple thing but nothing sticks to it and it even has a place for measuring pie crust diameter (yes you can make pies in the combo oven).
Before silicone mat, note the cracks and ventsWith silicone mat
Because I know you will ask,
Getting back to using the convection/microwave oven, I have found that you are only limited as to what you can bake, by the size of the dish. I have cooked casseroles, pies, cakes, pizza, cookies and even loaves of bread. To be honest I have never had anything come out badly because of the oven. Just a couple of things i have learned:
Because it is a convection oven, it means that it cooks primarily with moving air. The more air can access the pan that you are cooking in, the better it works. So I always put the pan or casserole dish on one of the racks, usually the lowest one. This way, air gets under the pan as well as around it.
Supposedly the convection oven cooks faster than a regular oven. I have really not found that to be true. To be safe, I always set the timer for 5 minutes less than the recipe calls for and then I check for whether it is done. Usually i need to cook it the extra five minutes.
Preheat is really important. but it can take the oven a really long time for it to get up to 450 degrees. Often I won’t wait. I will give it 20 minutes or so then i will put the dish into cook and plan on giving it a bit more time.
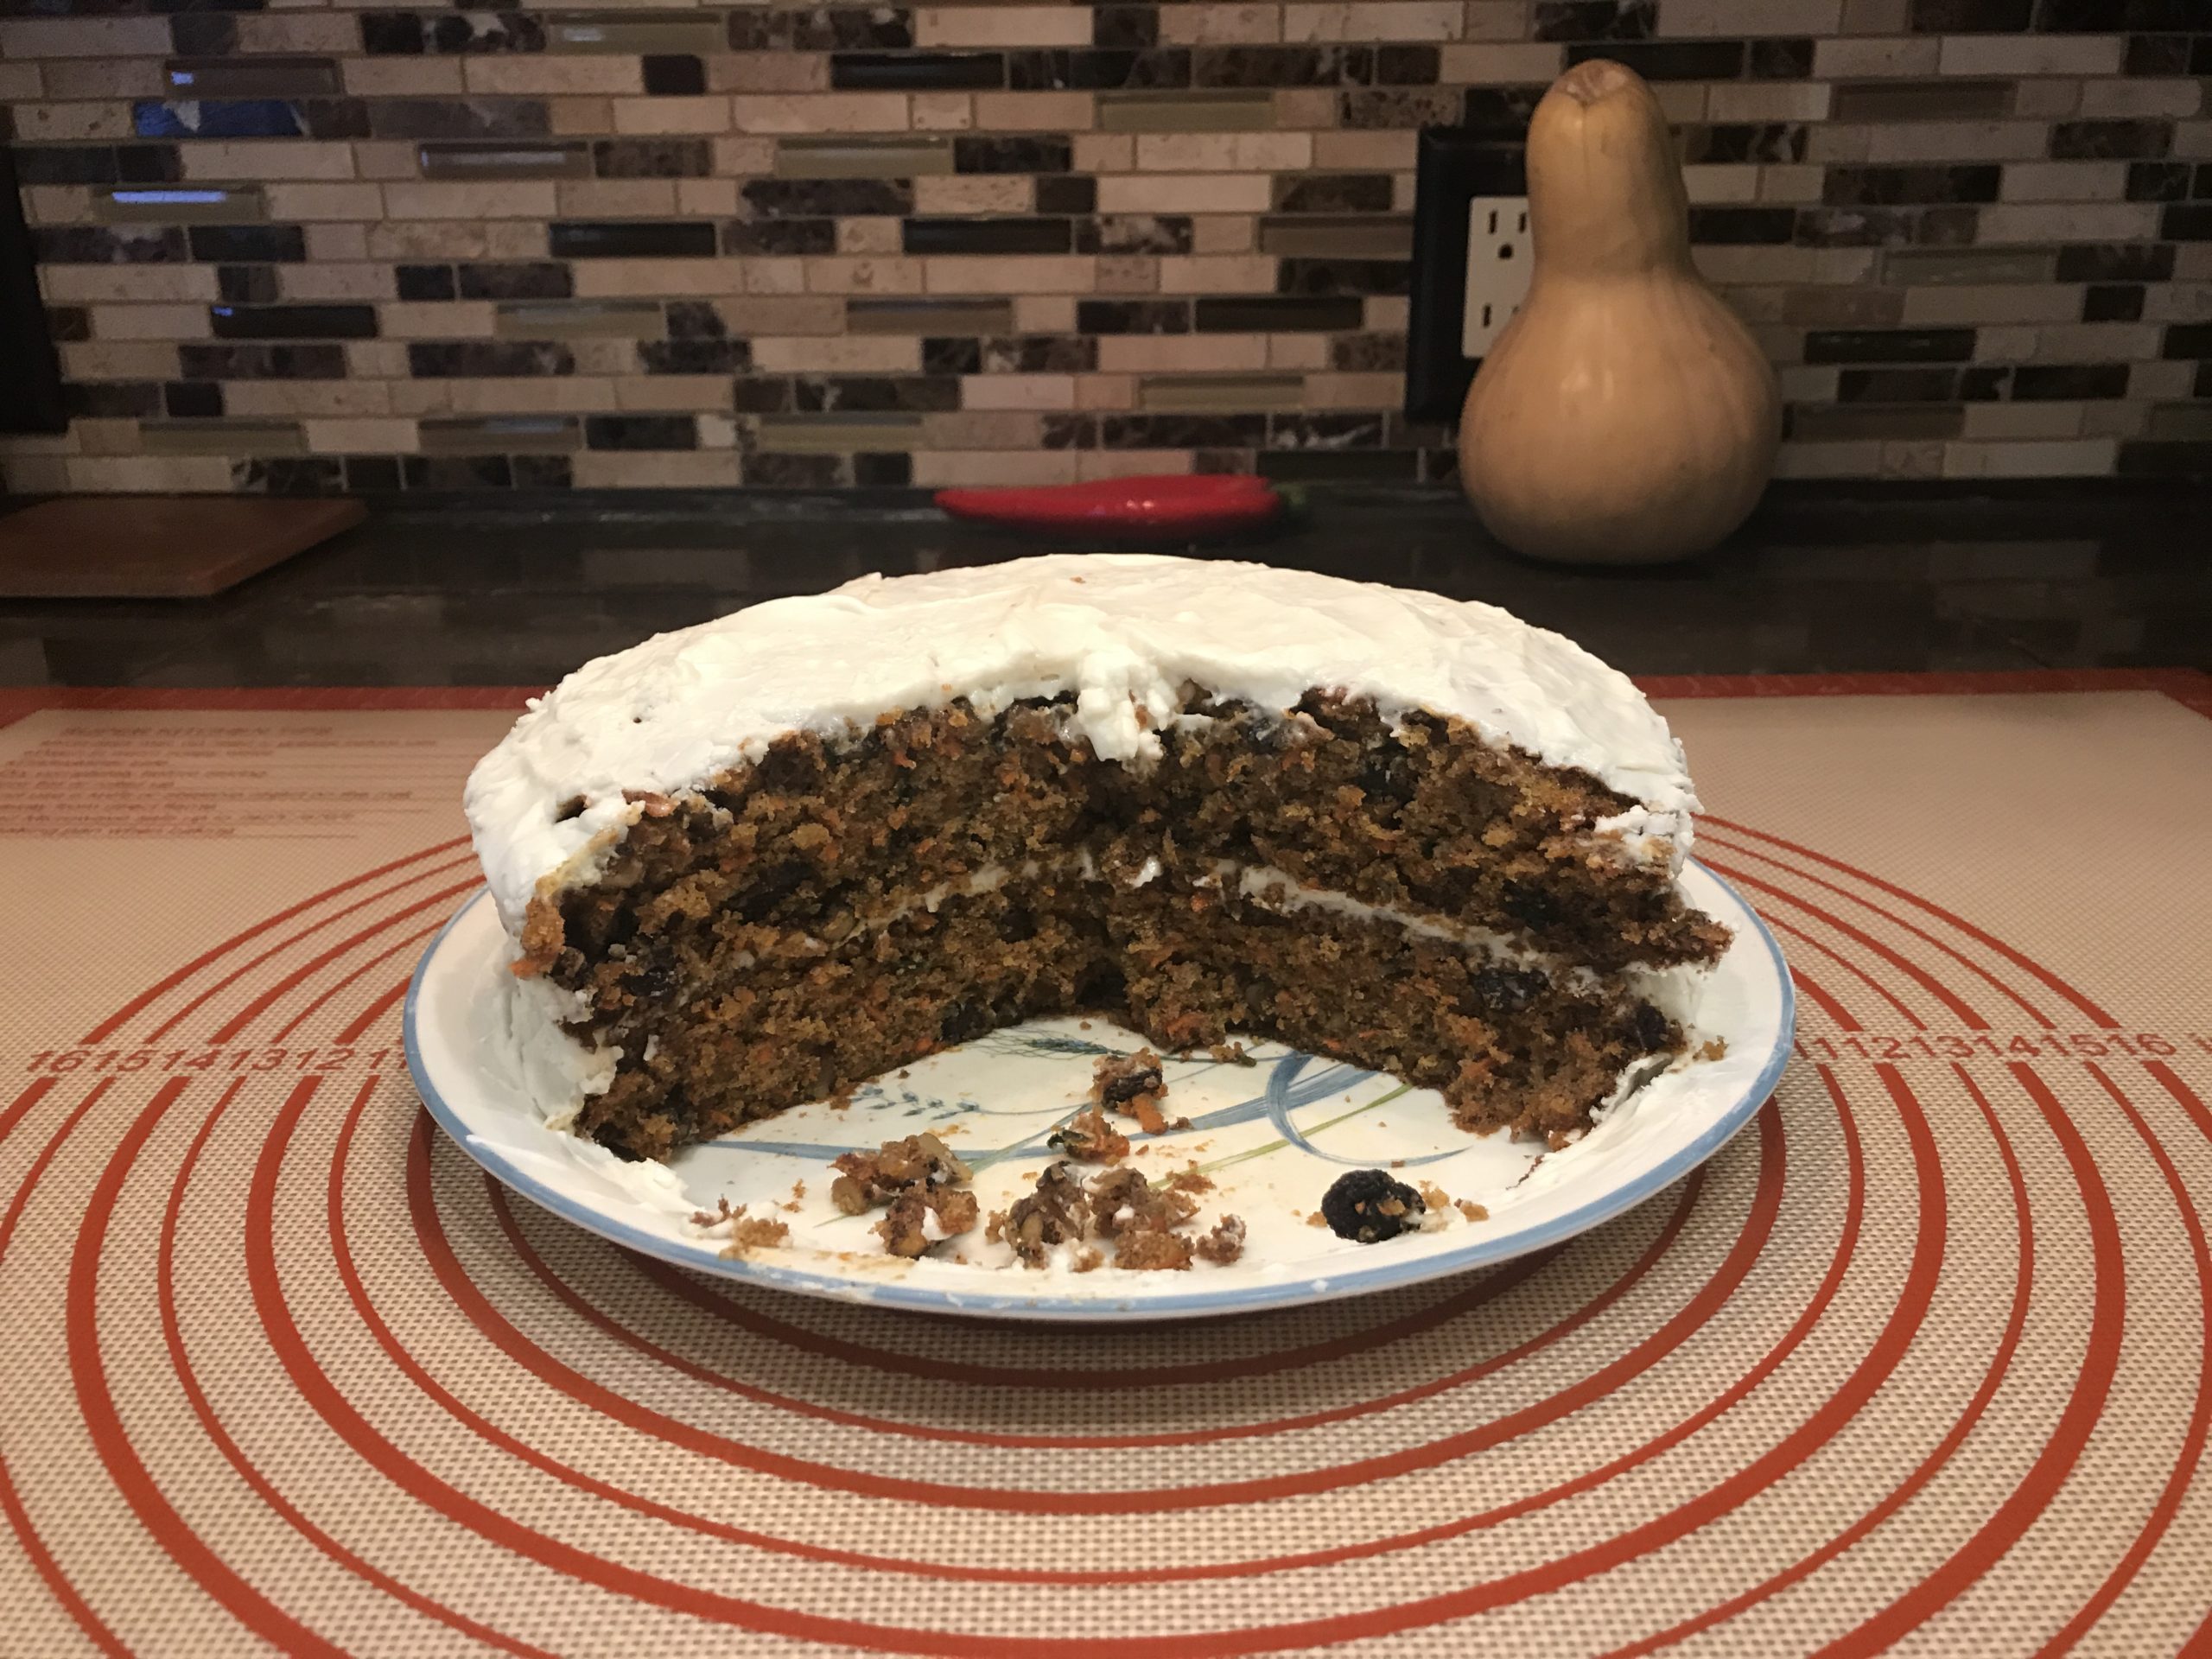
Yesterday I cooked a double layer carrot cake. It was amazing. I cooked each layer one at a time as obviously both will not fit into the oven.
So I hope this little post maybe gives you wannabe RV cooks some encouragement. If someone like me can successfully cook in an RV, you can too. Do you have some experiences about cooking in you RV? I hope to hear some comments, ideas, suggestions, and questions. Click here to get in touch!
Now that you are in the habit of inspecting the roof of your RV at least once every 2 months, what should you do if you find a seam that you think is questionable?
You should be looking carefully around hatches, fittings, antennas and anything else mounted to your roof. Look closely for any signs that the caulking is separating, or is cracked. Remember the roof like everything else in your RV, it is in a constant earthquake as it goes down the road. No matter how good the caulking or how new the RV is, cracking and separation will happen. The goal is to catch it early before water can leak in and cause major damage.
It goes without saying that before you began your inspection that you cleaned your roof of any dirt or foreign matter so you can get a good look. If you find an area of concern ask yourself, could water find its way through this small crack or separation?
If the caulking that is split, or cracked or separated looks supple and not dried out, then you can clean just the area of the crack or separation carefully by using a puddy knife and and small stiff brush. Remove any caulking that appears to be dried out, better safe than sorry.
In my 18+ years of full time RVing, I have tried many different caulking. Mainly i experimented in my early years cause I didn’t know any better. For years now, the only caulking I will use on any RV is Dicor.
The company makes several products, even a complete coating for rubber roofs. This post is addressing maintenance, however so there two products we recommend . The first is Dicor Self Leveling Lap Sealant.
The “self leveling” part means that you would use it primarily on horizontal surfaces, like the roof. When you put it on, its almost like magic as in an hour or two, it forms this pretty smooth puddle on what ever you coated it with. Even if after you are done with the application it looks kind of rough, the sealant will level itself and look much better.
The second product is Dicor Non leveling Lap Sealant which you would use more on vertical surfaces like the seam around a door. This product pretty much doesn’t move after application.
I want to warn you of a couple of things about using either Dicor product. It gets on EVERYTHING. It is not easy to work with as it sticks to anything and is very difficult to remove. It seems to have a mind of its own and “travels”. In fact:
wear old clothes
wear old shoes
use paper towels to clean things not rags. When you wipe off Dicor off something with a paper towel, throw the towel away.
wear gloves, old ones you dont care about, rubber disposable gloves are best
some people say to smooth seams with a wet finger. I have NEVER had good luck with this.
I just apply it carefully, put plenty on and then let it do its thing(we are talking about the roof now)
it is difficult to reuse the tube of Dicor on another application at a later date. It is almost impossible to seal the tube. I have found a big screw, screwed into the end of the tube works best. Any air that gets into the tube will render the remaining sealant useless.
Dicor takes at least a day or two to cure. Stay away from it until it is totally dry!
A sewer fitting before Dicor Self Leveling Lap Sealant
Same sewer vent after Dicor
I highly recommend this product. For the full timer, in my opinion it does not make any sense to try anything else. People ask can I use the product “where the guys coats his rowboat?,” The answer is NO. lol…
The Dicor comes in a couple of colors, white, black and gray. It works fine on all rubber and fiberglass roofs.
This one is the self leveling product for the roof.
This one is the non leveling, non sag product mainly for vertical surfaces.
I decided to jump ahead a bit and populate this section of the blog as I am really excited at a solution that we have found to very hard water. We have been testing it for a little over a month.
We recently moved to Desert Hot Springs California which is just about 15 miles from downtown Palm Springs. Yes we know its hot this time of year!! But its a “dry heat”.
I have always loved this area. But one of the first things we noted when we moved here was how really awful the water was. Pretty much the water is very hard all over the southwest. It practically foams when you turn on the faucet and using a TDS meter (total dissolved solids) it shows that the water here has a huge number of dissolved minerals. It is after all Desert Hot Springsand it is known for its mineral hot springs. There are hotels all over the place advertising that their pools are fed by natural hot mineral springs.
Well that is nice and all, but try to take a shower in it or drink the water and you quickly discover that suds are almost non existent and the water really does not taste very good.
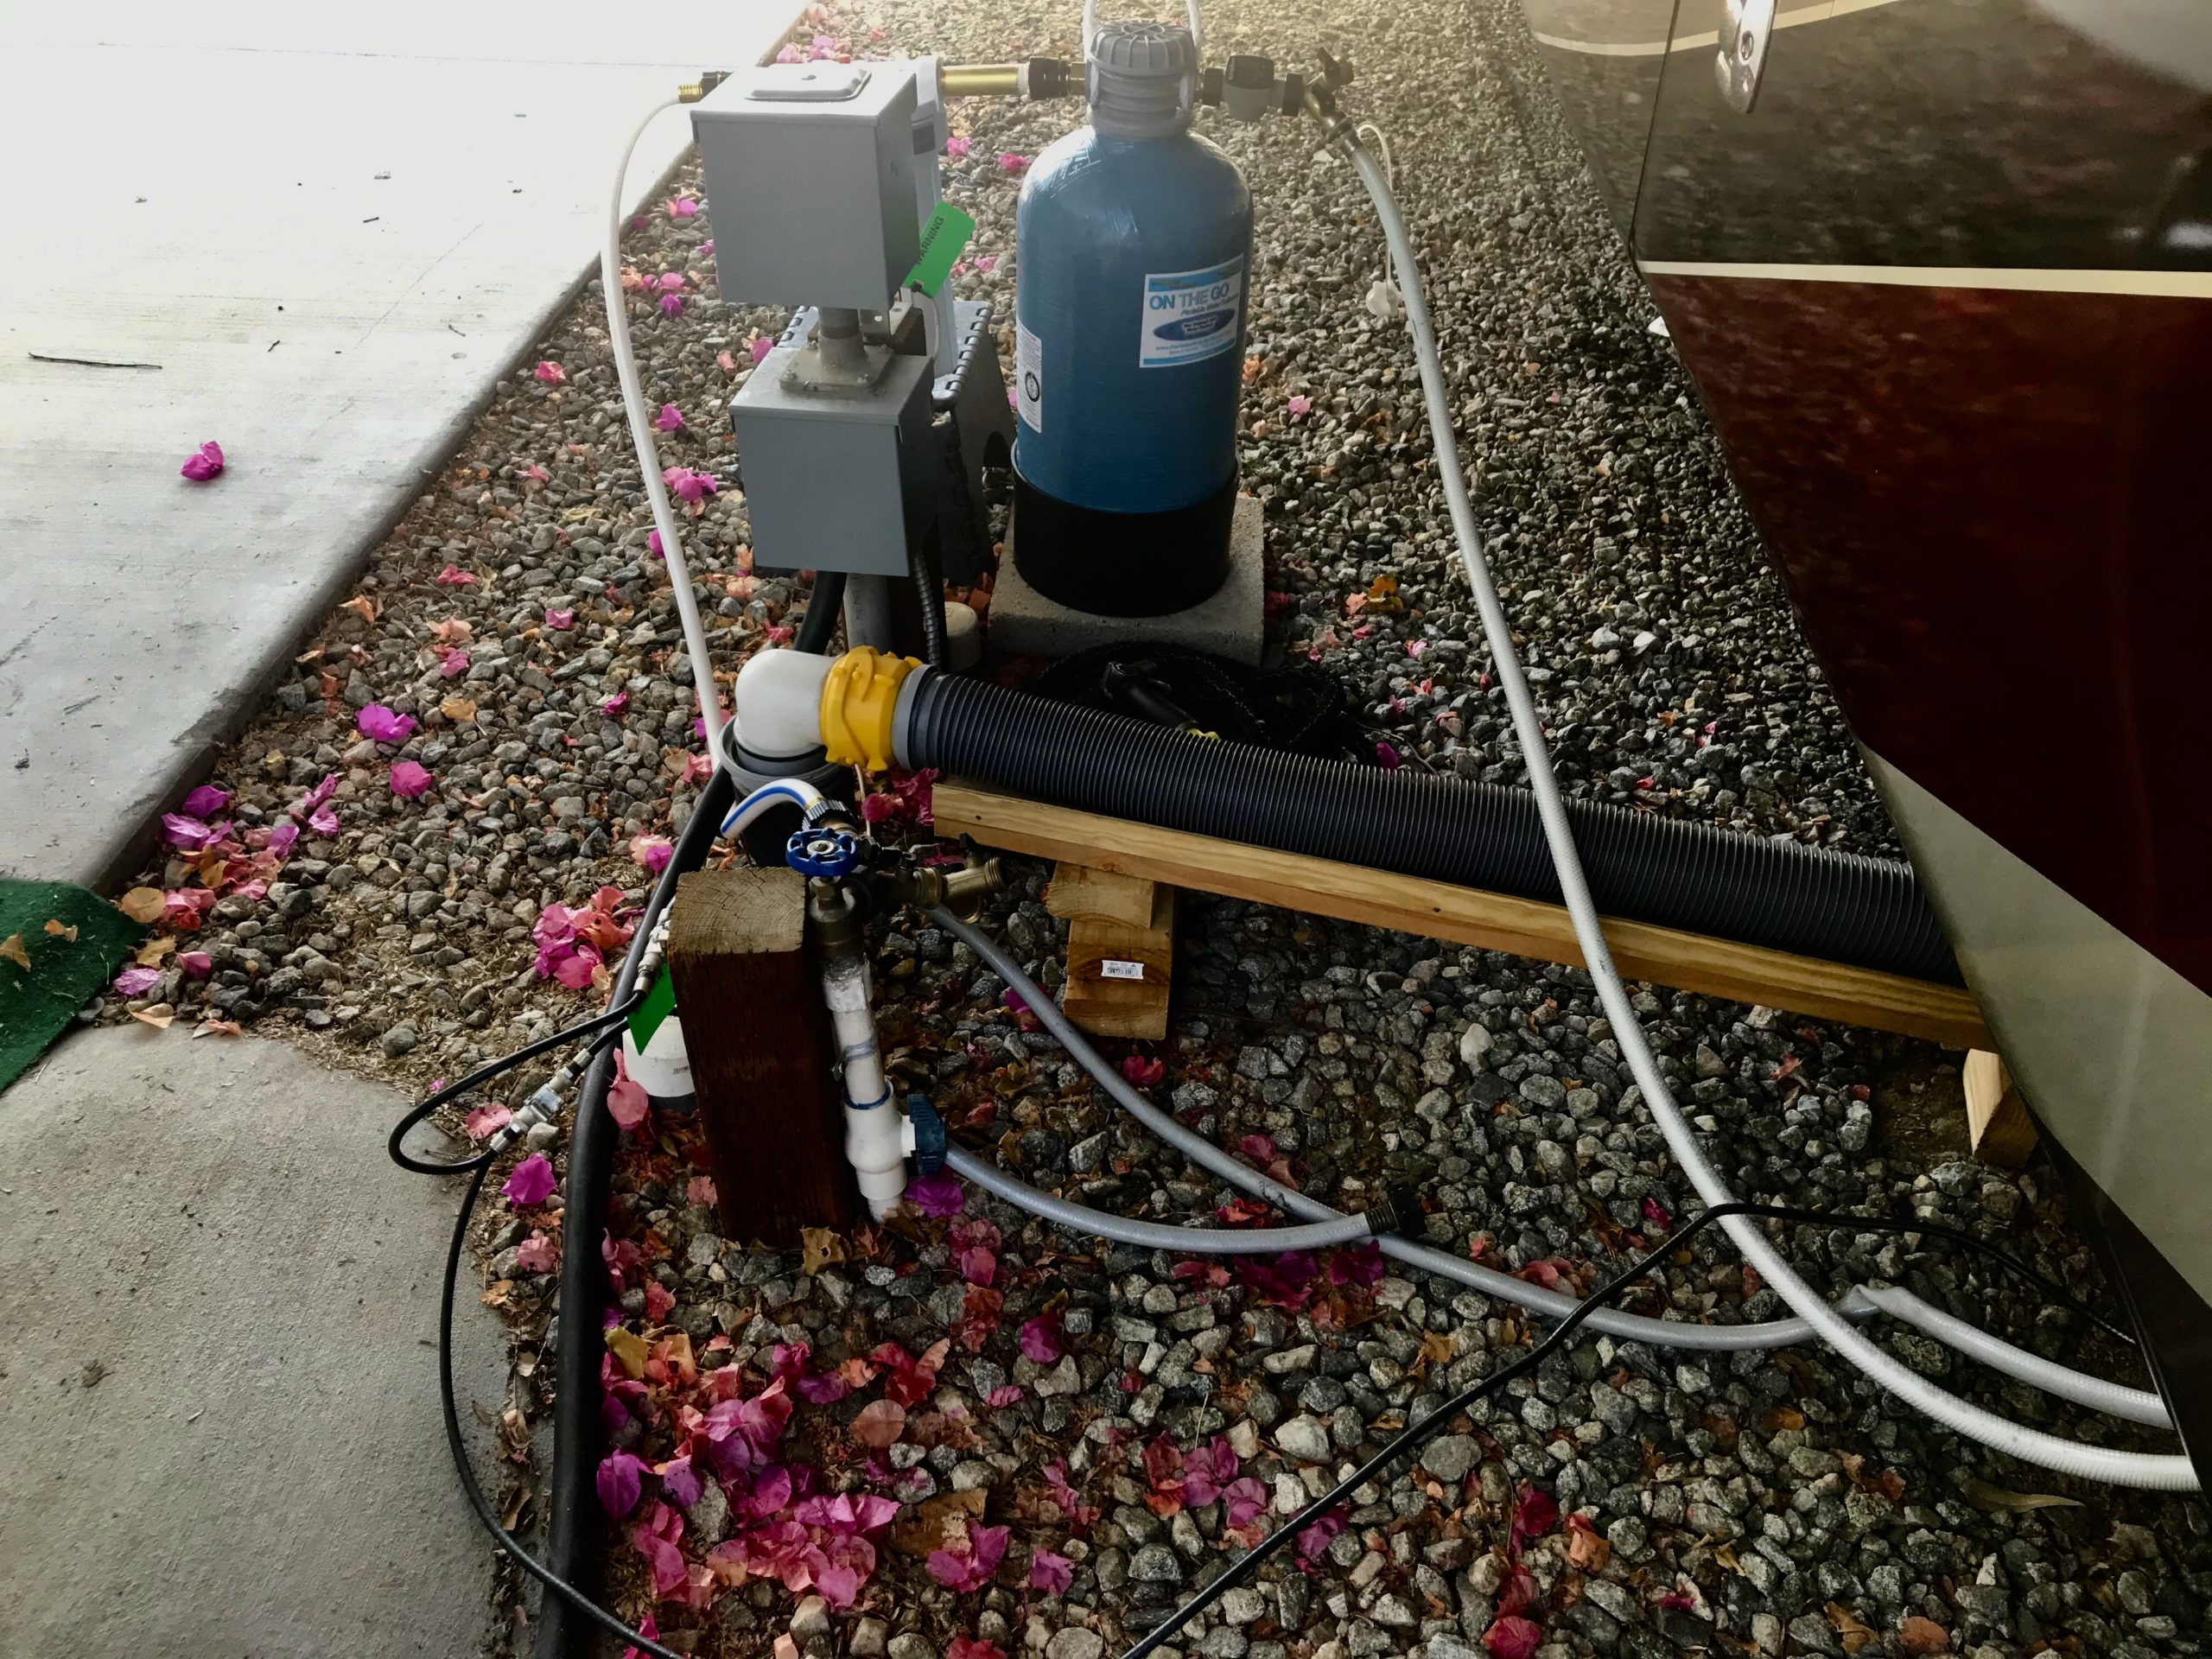
So we researched and researched and decided to purchase an “On The Go” water softener double size. To the left is a picture of our set up.
Note a couple of things:(click on these pictures to enlarge them into a separate window}
We put quick connect fixtures on everything accept the outflow to the motorhome to make it easy to do the regen process and to pack it up.
we have a carbon sediment filter going into the softner.
You can’t see it but there is also another sediment filter inside the motorhome,
We put a simple digital water meter on the outflow before going into the motorhome.
Our conclusions:
The difference is amazing. Water+ soap= suds! The softener lowers the dissolved solids by 1/3 and removes most of the minerals that make the water “hard” .
No more corrosive rings around the sink and faucets from standing water that evaporates.
The water tastes good and makes great coffee!
We are glad that we are saving our plumbing from the affects that hard water can have on it over time such as build up of scale and deterioration of seals on toilets, valves and our water pump when we fill the water tank.
We contacted the company who makes and distributes the “On The Go” product and the service was excellent. He took a great deal of time answering all our questions and helping us understand how the water softener works.(its kind of complicated)
Maintenance is a breeze. It takes about 1/2 hour to regenerate the softener using two boxes of common table salt. We do this every 2 1/2 weeks or so. Actual time working on it is about 5 minutes. You have to wait for it to do its thing for about 1/2 hour.
The frequency of regeneration depends on the hardness of your water and how much water you use.
This product is an excellent value at about $300. including shipping. The additional hardware would be about $50 more.(we opted for the brass fittings)
Recommendation: We highly recommend this product. You can purchase it on Amazon.
This section of our Blog is all about the essentials that you need for living in your RV, WATER, ELECTRICITY, PLUMBING,HEAT, AC, SEWER AND INTERNET. There is so much to say surrounding these four subjects that it is a bit hard to begin. Please understand that all of this is a work in progress and that this section in particular, will grow quite rapidly. Keep checking back for more and more great information.
Don’t hesitate to write us with questions and comments to help us get started!